
3 Ways to Make Homemade Yogurt
This post may contain affiliate links. Read our disclosure policy.
Want to save money on your grocery bill and have a superior food product than you can buy in the store? Have you ever made your own Homemade Yogurt? Today I’m going to show you just how easy it can be!

Homemade Yogurt
Homemade Yogurt is one of those “make your own” foods that seems a little scary when you look at the directions for it. Properly culturing your milk? What if it doesn’t work or what if it’s too runny or doesn’t set up? What if it turns out like gelatin? I understand. Over the years I’ve tried making yogurt several different ways just to experiment with recipes and today I’m sharing with you my favorite way to make it along with some alternative methods to try.
–Find more Homemade Dairy Recipes here.
How to Make Homemade Yogurt
What You Need:
- 1/2 gallon Whole Milk
- 1/4 cup Yogurt with cultures
- 1 tablespoon Sugar
- 1 teaspoon Vanilla Extract
- 1 teaspoon Gelatin (optional)
- Yogurt Maker
- Candy Thermometer
My recipe uses either a previous batch of homemade yogurt or yogurt from the store that already contains cultures. I have tried the yogurt culture tablets but have had much more success with using another batch of yogurt instead.
You will also need a Yogurt Maker and a candy thermometer to make this recipe. The thermometer is not optional and you can pick one up for around $5. If you’d rather not use a yogurt maker, you can try one of the methods near the bottom of this post or possibly try using your oven (I have not tested that method). I have a Euro Cuisine Yogurt Maker plus an extra set of yogurt jars.
In a saucepan, begin heating the milk. Use your thermometer to monitor the temp. You want to heat the milk to 180 degrees F. Whisk the milk as it’s heating. At this time, you can stir in a small amount of gelatin if you wish. If you’ve made yogurt before and it’s too runny, gelatin can be very helpful bt only a small amount is needed.
Once you have finished heating the milk. Remove it from heat immediately. Whisk it gently from time to time to cool it down OR stick the bottom of the pan into cold water to cool it down more quickly. Watch your temperature carefully. You want it to get down to 110 degrees F.
—Homemade Frozen Yogurt is SO easy to make!
Once you’ve reached 110 degrees, stir in the yogurt, sugar, and vanilla. The sugar and vanilla are optional, however, the sugar will help your cultures have something to munch on which will result in a thicker yogurt. Something to consider if you’ve had issues with runny yogurt. The vanilla is just for flavoring. No need to add if you want a plain yogurt.
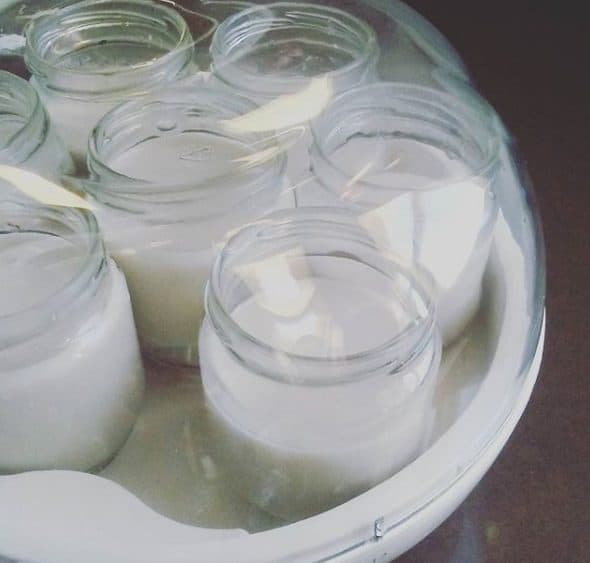
Once you’ve whisked in all your ingredients well, pour the mixture into your clean, prepared yogurt jars.
Place the jars into the yogurt maker (I like to already have my light on and the machine warming). Turn it on and let it set in a warm, undisturbed place. Note the time…your yogurt will need to culture for at least 8 hours. Longer if you like a tangier yogurt. Once the yogurt is done, store it in the fridge. Our yogurt made with this method usually lasts about 2 weeks.
Of course, you can top your yogurt with a tasty Homemade Granola, fresh or frozen fruit, or anything else that you normally love on your yogurt! Just be sure to save back 1/4 cup of the yogurt to start the next batch.
–Use your homemade yogurt to make Yogurt Cheese.
Need to print this to add to your Recipe Binder? Get this easy Homemade Yogurt recipe below:

Homemade Yogurt
Ingredients
- 1/2 gallon Whole Milk
- 1/4 cup Yogurt with cultures
- 1 tablespoon Sugar
- 1 teaspoon Vanilla Extract
- 1 teaspoon Gelatin optional
Instructions
-
In a saucepan, begin heating the milk. Use your thermometer to monitor the temp. You want to heat the milk to 180 degrees F. Whisk the milk as it's heating. At this time, you can stir in a small amount of gelatin if you wish. If you've made yogurt before and it's too runny, gelatin can be very helpful bt only a small amount is needed.
-
Once you have finished heating the milk. Remove it from heat immediately. Whisk it gently from time to time to cool it down OR stick the bottom of the pan into cold water to cool it down more quickly. Watch your temperature carefully. You want it to get down to 110 degrees F.
-
Once you've reached 110 degrees, stir in the yogurt, sugar, and vanilla. The sugar and vanilla are optional, however, the sugar will help your cultures have something to munch on which will result in a thicker yogurt. Something to consider if you've had issues with runny yogurt. The vanilla is just for flavoring. No need to add if you want a plain yogurt.
-
Once you've whisked in all your ingredients well, pour the mixture into your clean, prepared yogurt jars.
-
Place the jars into the yogurt maker (I like to already have my light on and the machine warming). Turn it on and let it set in a warm, undisturbed place. Note the time...your yogurt will need to culture for at least 8 hours. Longer if you like a tangier yogurt.
-
Once the yogurt is done, store it in the fridge. Our yogurt made with this method usually lasts about 2 weeks.
Recipe Notes
My recipe uses either a previous batch of homemade yogurt or yogurt from the store that already contains cultures. I have tried the yogurt culture tablets but have had much more success with using another batch of yogurt instead.
You will also need a Yogurt Maker and a candy thermometer to make this recipe. The thermometer is not optional and you can pick one up for around $5. If you'd rather not use a yogurt maker, you can try one of the methods near the bottom of this post or possibly try using your oven (I have not tested that method).
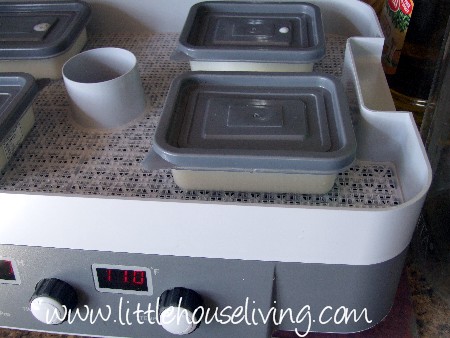
Homemade Yogurt in the Dehydrator
If you have a food dehydrator, you can use it to incubate your homemade yogurt! Making homemade yogurt in the dehydrator can be a great way to utilize that appliance to it’s fullest potential.
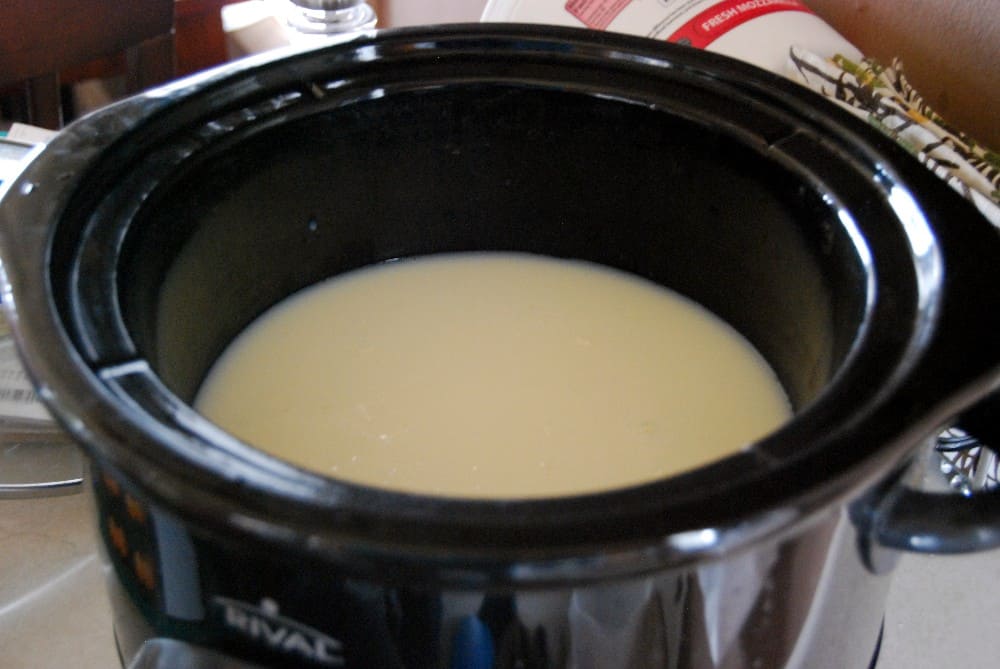
Homemade Yogurt in the Crockpot
Another great way to use a common household appliance is to make your yogurt in your crockpot! Since it’s a little harder to control the temperature in a slow cooker but it’s still very possible and simple to make your yogurt in this appliance.

There are so many different ways to make your own yogurt and so many different recipes that you can use it in, along with just eating it plain of course! Hopefully, this tutorial has inspired you to finally give homemade yogurt a try.
Now that you’ve got some yogurt made, how will you use it? Here are a few recipe ideas:
Frozen Yogurt Smoothie Recipe
Yogurt Fruit Dip Recipe
Homemade Yogurt Pops
Yogurt Chocolate Chip Cookies
Greek Yogurt Pancakes
Have you ever made homemade yogurt? How did you make it and what was the outcome?

This Homemade Yogurt recipe was originally published on Little House Living in November 2018. It has been updated as of November 2019.
I make mine in my wonder oven. I heat the milk, let it cool down, add yogurt culture, put it all in a jar and place in the wonder oven for a few hours. It sets up just fine and has no added sugar or anything. I love it and eat it with homemade granola .
I make mine in my crockpot. I use a gallon of milk, heat it on high until it reaches 180°F, then turn it off and let it cool to 115° F. I then whisk in my yogurt culture, usually saved yogurt from a previous batch, about 2 cups. Cover with towels and let sit/set overnight. Then portion out into my jars. I do have to keep an eye on the temp, but I usually plan on working in the kitchen on meal prep so I don’t forget it.
Need to avoid dairy. Can I make with coconut milk or almond milk? Has anyone tried this?
Yes, I have! Just be sure and use a full-fat coconut milk with no additives except water. There are a few canned varieties that will work for this.
Do you have a recipe for doing yogurt in an Instant Pot?
I’m sorry, I don’t. I don’t use an Instant Pot.
I have an instant pot. I use it to make yogurt and my oven with just the light on sometimes. This website goes into detail on how to use your instant pot for yogurt. Very similar to the yogurt machine but one less device.
https://www.simplyrecipes.com/recipes/instant_pot_yogurt/
Hope this helps!
My recipe is even simpler, cheaper and is not as complicated as the above. I buy a gallon of milk, doesn’t matter the fat content. It is already pasteurized so I don’t reheat it. I bought, way back in the past, a Balkan style yogurt and used that as my starting culture. It does not have gelatin in it, just milk and culture. One quart of the yogurt to one gallon of milk. I mix the two and let it sit at room temperature 24 to 36 hours, covered. It’s nice and warm on top of my fridge. I will taste it in 24 hours to see if it has reached the right amount of tang that I like. Then I portion it out and always save about 1 1/2 c to start the next batch. I was raised on the farm and I am in my 60’s and haven’t died yet. These young city dwellers that will look horrified that I leave milk out of the fridge really don’t know what they are talking about. They are the ones that think eggs need an expiry date too. Always look with suspicion at someone that calls themselves an expert.
I use a cooler with a hot water bottle that cools over night and sets the yogurt. I always make one jar with what is needed for the next batch . It is ready to go.
I make mine in my dehydrator and because I cap the pt or jelly jars with a lid while it runs for about 4 hrs, it seals just enough that it keeps for months! If you let it go for another hr, it tastes like the greek yogurt which is nice and thick.
My dehydrator has a low; med; and high setting. Do you know the temp your dehydrator runs at?
Does tour dehydrator have a tempature option? If so what temp do you set it at or what is the temp your dehydrator runs at. Your way of doing it sounds easy and wonderful!
Dairy free version?
Still working on dairy free yogurt…so far mine either turn out too runny or too firm. I have a new box of cultures though to try and see if I can get it to work!
Which part of the process would you add fruit?
After it’s finished you can mix in fruit or a flavor although we personally do this when we serve it.
Can fruit be added to the yogurt for flavores? If so, when would you add?
I always flavor the yogurt later, not in the process of making it.