
Building Our Root Cellar – Underground Root Cellar Tour
This post may contain affiliate links. Read our disclosure policy.

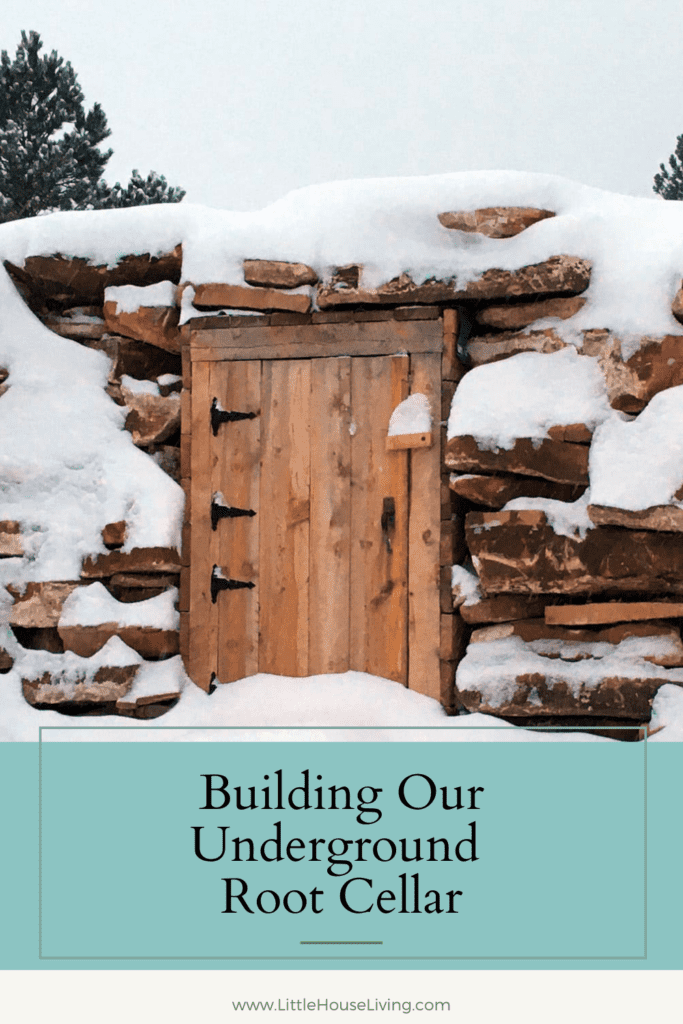
Ever wanted to peek inside an underground root cellar? Ours is finally finished and ready to show to you!
Building Our Root Cellar
For many, many years I’ve wanted a real root cellar. One that I can store fresh foods in to last as long as possible in the winter.
In the past, we’ve used a cold entryway, a dungeon basement, and other areas of our properties. All work ok for a temporary root cellar or way to have cold storage, but I knew that none was the equivilant of having a real root cellar.
When we first moved onto our current property, there was a large dug out area near where we planned to build the house. I’m not sure what the previous land owner was trying to do here but we definitely had to do something with it, especially if we wanted to keep our children from falling over the edge.
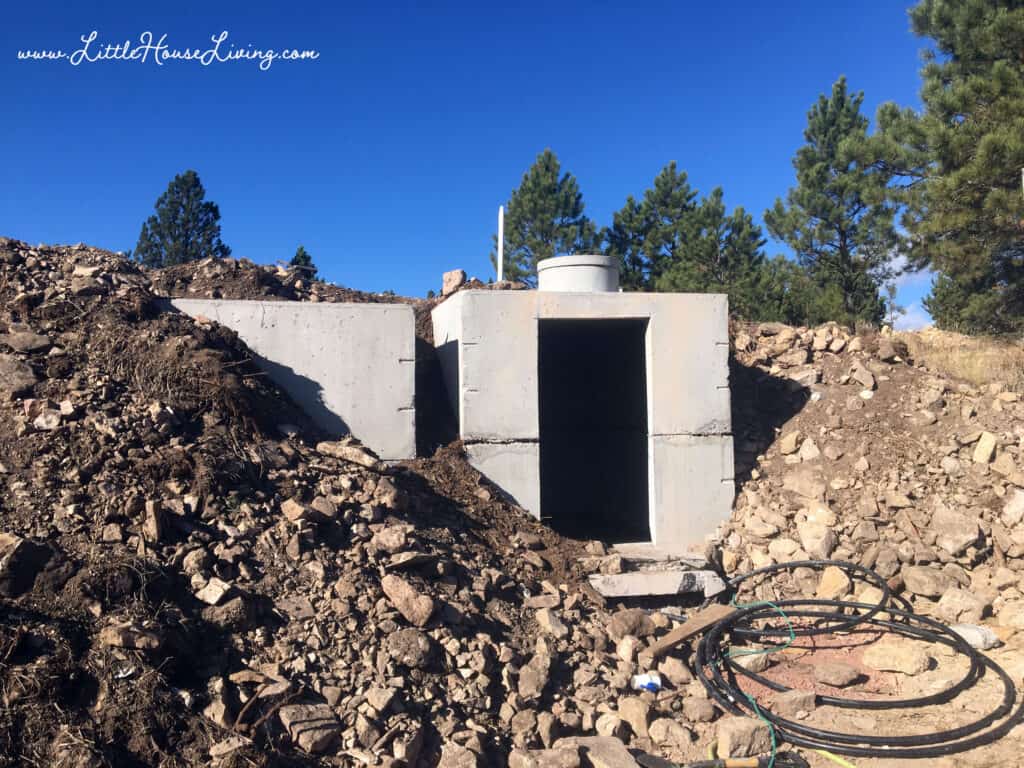
Shortly after we moved, we decided we needed to get a backup cistern. We live in an area where we have to haul all our water in (currently working on rainwater collection) and the cistern attached to the house holds 1200 gallons. It’s enough to last us 2 weeks (longer if we conserved) but we were concerned about winter and not being able to get out to get water. So we decided to add a second cistern in this empty spot next to the house. For this, we purchased a 2500 gallon concrete cistern and put it in part of the dugout.
During this process, we learned that the company we bought our cistern from also had some very discounted “cracked” cisterns that weren’t good for holding water, but could be used for other things. We went and took a look at them and realized this would make the perfect sized root cellar.
This was not a quick or easy process and we were determined to do it with cash and to use what supplies we could for free as well. I always feel bad when I see other bloggers get out blog posts of new projects in no time but my reality is that good things take time (if you don’t have a large amount of money!). So I hope that you will excuse the time it took for me to get this posted. 🙂
Below you will find all the steps that we took to turn this into our root cellar!
We started by leveling the site and adding in gravel so that the cistern had something better to sit on. We live in an extremely rocky area so we were not concerned about it sinking in but we did add a little just to level the ground.
Once that was done, we were ready to place the cistern! We had it delivered by the company since their truck was needed to put the 2 halves together.
Next came the most difficult part, cutting the doorway. We rented a concrete saw from a local company and cut out the space needed to create an entrance.
Before we began backfilling around the tank, we placed the venting out of the back (there was already an opening for this in the bottom of the cistern). This is the PVC pipe that you see sticking out of the back of the cistern in the picture above.
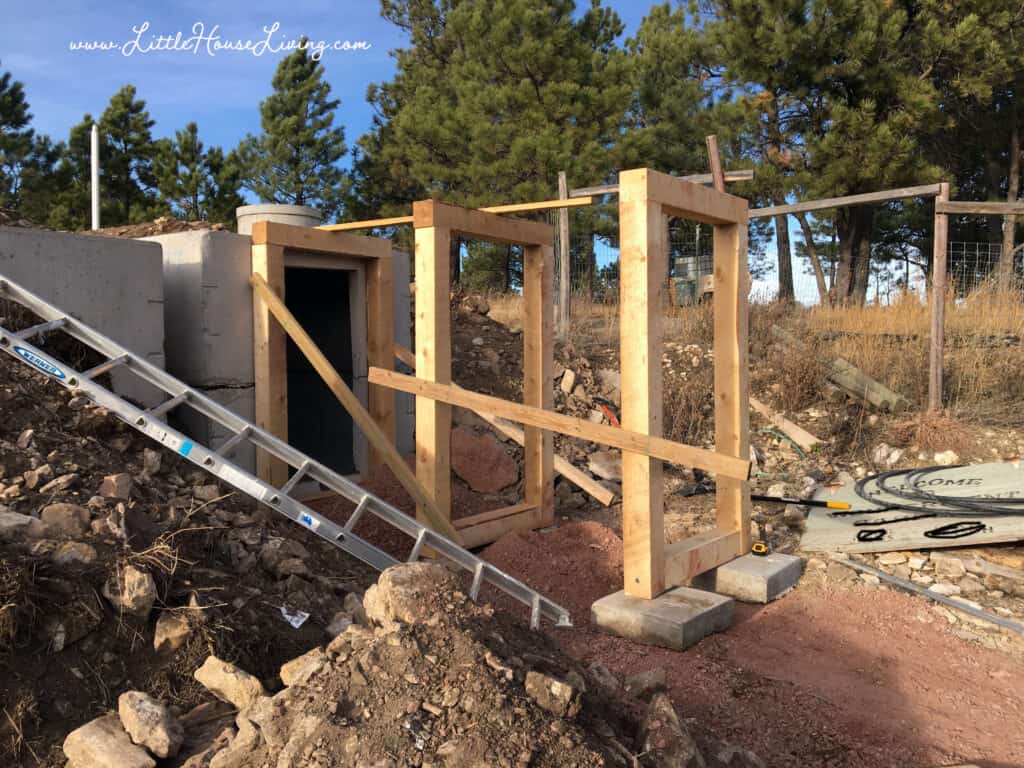
We determined that a “mine shaft entrance” would be the best fit for the location of the cellar. To build this we used rough cut lumber from our local sawmill and some concrete pieces that we found on our property.
This entrance will not only block the elements when we go into the root cellar but help us be able to get it underground as far as possible.
We added more gravel in this area to have a clean place to walk when we entered the root cellar.

After the skeleton was built, we used more of the rough cut lumber to build walls on the entrance.

Here’s another view of the entrance in progress with part of the side and the roof on.
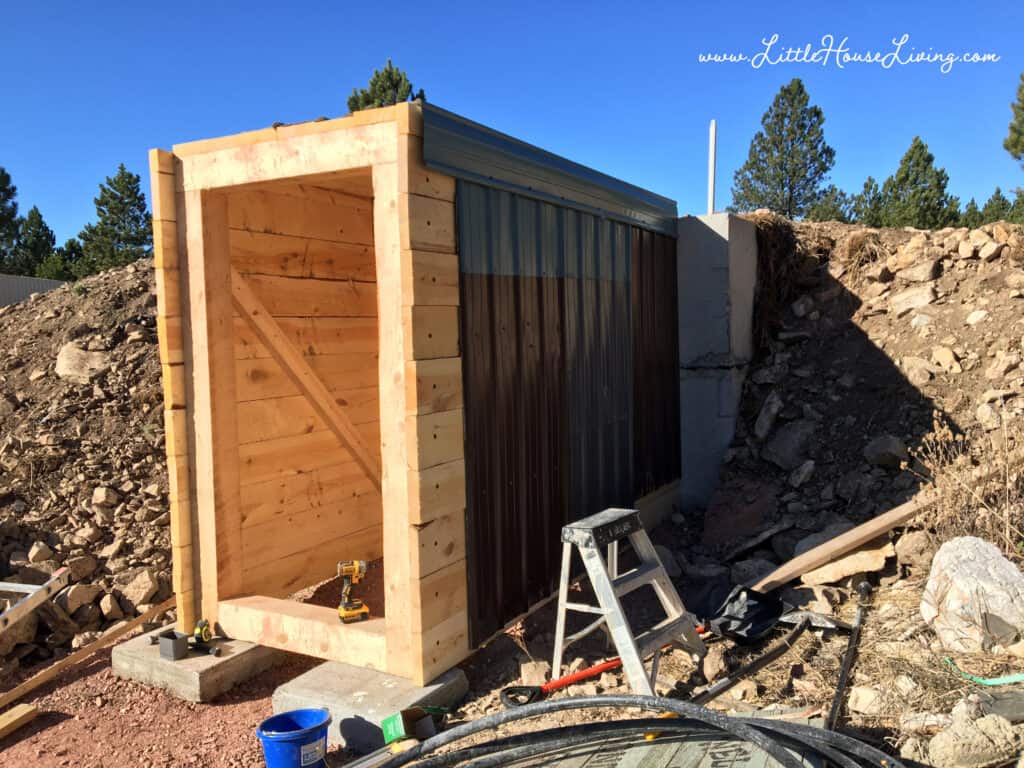
We didn’t want to bury the wood right in the dirt and rocks so once we finished building the entrance, we took leftover steel siding/roofing from our house and covered the entire wood part of the structure.
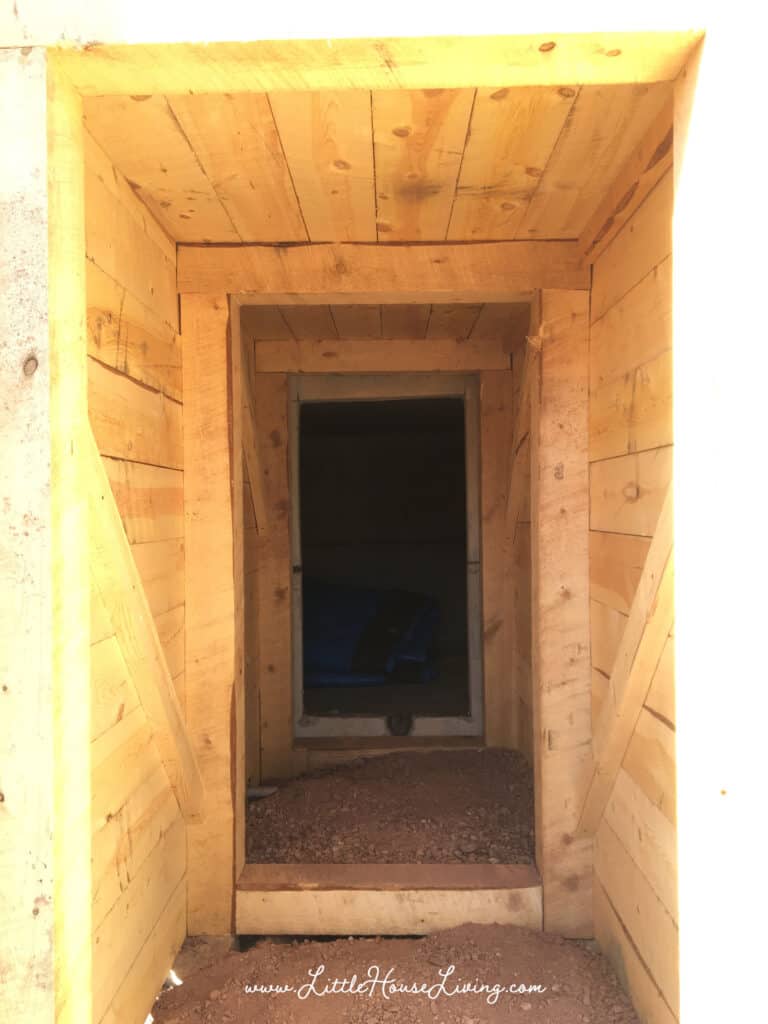
Here is a picture of the inside of the entryway with the sides completed. After this we evened out the gravel that was inside and made it level with the beams. We also added cross bracing.
The entryway is roughly 4 feet wide by 10 feet long.
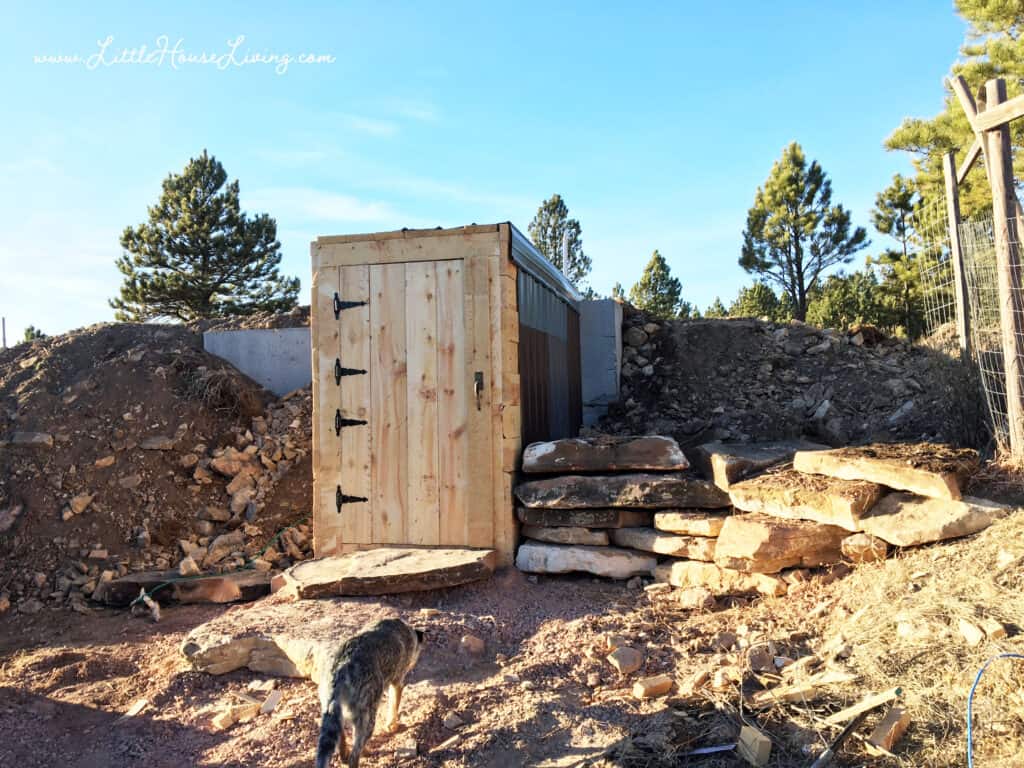
The next step was to build the outside door which my husband again created from the rough sawn lumber. We did buy some cool old fashioned hinges and found a neat old door handle to give it a little more character since it’s sitting right next to our house.
We then started the massive undertaking of finding flat stones and putting them up as steps leading to the door, as well as putting them around the doorway to create a wall. We partially backfilled the area over the concrete cistern but did not do any backfill over the entryway until we gathered all of these stones.
Each stone is massive and we did have to rent a mini excavator to dig these and lift them into place. All of the stones are from our property.
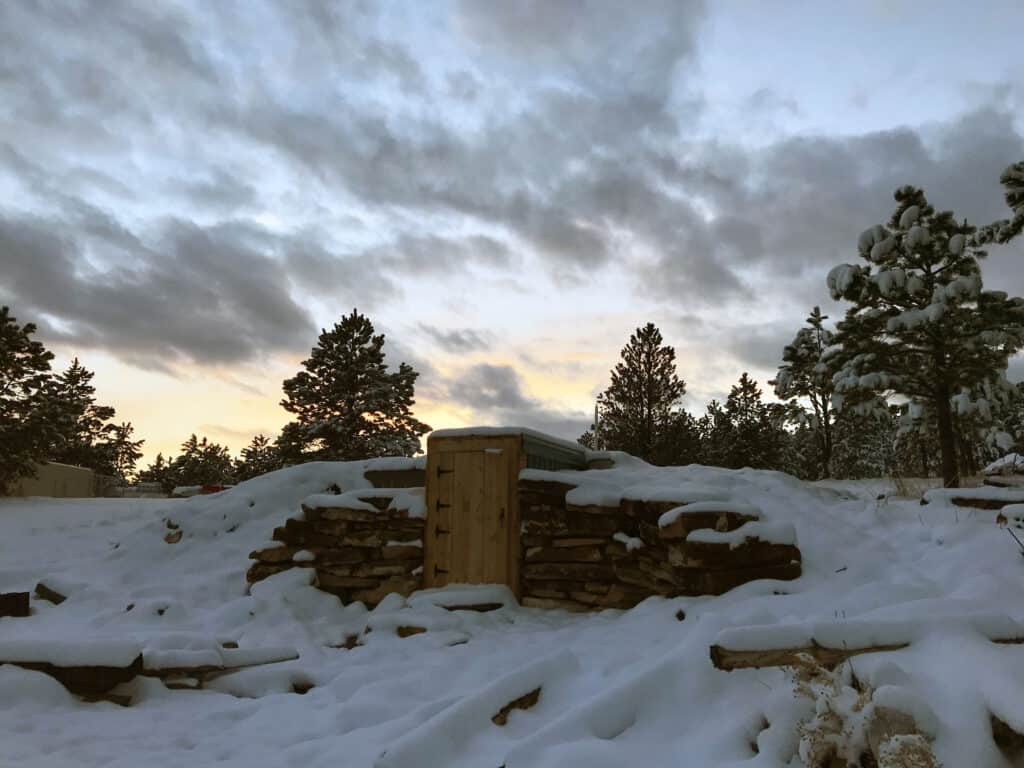
Snow came before we could finish the root cellar. You can see in the above picture that we worked more on the walls and we did begin the backfill of dirt and rocks around the entrance before it snowed. After this we had to wait until spring to be able to dig more rocks and dirt to finish it up.
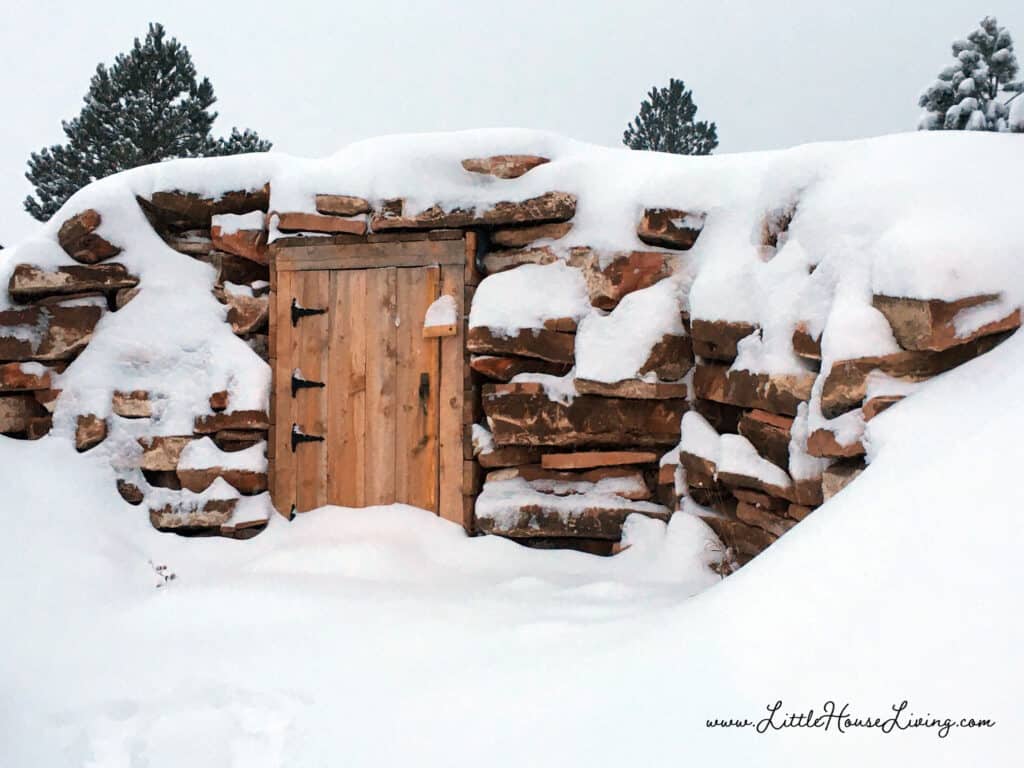
It took us another summer to finish digging the rocks and placing them to make the walls. After that, we backfilled all the area behind the wall with dirt and rocks and also put several more feet of backfill over the entire thing. (We still need to add another foot or two but that will be next summer’s project!)
To finish it up, we added an interior door as well as some additional venting and some shelving. Venting is extremely important to keep the ideal temperature of 32-40 degrees F and between 85-95% humidity.
Are you ready to see the inside?!
We began to love the idea of building a root cellar through the book Root Cellaring. It has ideas on root cellar builds (although, not this one) as well as what are the best vegetables and fruits to store in a root cellar and how to store them.
Cost Breakdown:
- 2500 Gallon Concrete Cistern – $800 + $300 delivery (we live in a very rural, difficult to get to area so delivery was more)
- Concrete Saw Rental – $75
- Wood – $400
- Hardware – $150 (pvc, hinges, new vented concrete cap, screws)
- Interior Door – $37.50
- Metal – Used leftover scraps from the house build
- Excavator rental – Was mainly being used for the house build at the time so not including the cost into the root cellar
Was this the cheapest root cellar we could build? No. Will is last the next 100 years? With the way my husband overbuilds things…yes. 🙂 We considered building a concrete block cellar in this area as well but the time and labor would have been greater and the cost about the same.
Questions About Root Cellaring:
How do you control the temp and humidity?
This is controlled by the outside weather and the venting that we added in the back and in the new concrete cap that we used to replace the one it came with. This is why it has good air flow. It’s not meant to be used in the summer. So far this winter it has not gotten above 40 degrees or below 32 degrees.
Can a root cellar be a storm shelter?
If it’s built well and underground it absolutely can! Although tornadoes aren’t common where we are living, they can happen and I’m glad we have a shelter to go to since we don’t have a basement.
What stores well in a root cellar?
Carrots, apples, cabbage have stored really well for us so far as well as oranges, pineapple, pears, and potatoes. We read a lot about what to store and just decided to test what works for us. We’ve been very surprised!
How long can ___ be stored?
Here’s some of the things we’ve stored so far that have done well:
- Oranges – 3 months
- Apples -5/6 months (depends on variety)
- Pears – 3 months
- Pineapple – 2 months
- Cabbage – 6 months +
- Carrots – 6 months +
- Potatoes – 4 months
- Winter Squash – 6 months +
Each item is going to store differently based on your set up and what else you are storing. We haven’t tried very hard to make the perfect storing setup on the inside yet (sawdust, sand, etc) just because of time constraints but it’s done exceptionally well so far.
What maintenance is needed on the root cellar?
Not much on the actual structure itself now that it’s built (although we still want to add more backfill on top to extend the useage). We do go in every couple of days and check the produce to make sure it’s all still good and anything that is spoiling gets removed and fed to the ducks.
How big is the inside of the root cellar?
Ours is roughly 6 feet wide by 10 feet long.
What will you do about snakes and rodents?
Our cats and dog tend to come in with us whenever we go inside so I’m pretty sure they would alert us if anything was amiss. 🙂
How do you clean the root cellar?
Since the floor is concrete I can simply sweep up any mess that we track in.
Could someone break in and steal from the cellar?
We don’t keep it locked since we aren’t near other people and this isn’t something we are concerned with. We do have security cameras on our property. I suppose you could easily add a lock to the outside or inside door if you needed one.
Can a root cellar be built in any location?
I don’t believe so. It would be very difficult to create a root cellar in a hot climate unless you went very deep underground. On summer days our root cellar stays in the 60s so without the natural cold that comes with fall and winter it would be hard to naturally keep cool. It would also be difficult to build an underground root cellar in an area with a high water table. That being said, I also don’t think anything is impossible!
I can definitely make another post on the topic of storing things in a root cellar as I don’t want this one to get overly long. So if that’s something you want to see, just let me know in the comments!

Thank you for the tour of your root cellar. So neat. 😊
Please put this into a Youtube! You went into such detail and have so many great pics. It would be so inspirational and show folks how it can be done!
The Youtube inside video tour is linked at the bottom of the article. If you have an ad/video blocker you might not be able to see it.
This is amazing and beautifully done! My grandparents had a root cellar under their wash house and I was terrified to go down there because of the spiders—ha! A spider wouldn’t dare invade your wonderful space. Best to you!
Aww, thank you! I’m sure we will have a few spiders in here at some point, I’ll just have to make sure to take a cat in with me for protection. 😉
You must be so happy with yourselves! What a tremendous job! I love seeing your videos. Thanks for sharing!
It’s absolutely amazing! Such a good thing to have. Thankyou for sharing the tour!
Forgive my ignorance, but you have to have your water trucked in? Is a drilled well not an option?
We live in a cavernous area so we’ve been told that wells are not an option however we still have yet to get well driller out here to really tell us for sure. We truck in all our own water for about $15 a month so it’s very inexpensive. We also are about halfway through setting up a rainwater system to see if we can collect all water needed that way.
I”m so glad to know there are young parents like you who will teach these valuable skills to the next generation. You give me HOPE. I have enjoyed receiving of your expertise for years. Hope you will continue living your dreams and helping us too.
Very nice and tight root cellar!
Please tell us what the two white pvc pipes on the left side of the tunnel with the blue handles are for?
What was the temperature inside the root cellar during the summer months and what was the outside temperature?
Did you seal the outside of the cistern with a water proof barrier before you infilled around it?
What was the composition of the infill (gravel/soil).
You mentioned a filter in the exhaust pipe on the ceiling, can you describe that please.
Thank you so very much.
The pvc pipes inside the tunnel go to the cistern that is buried next to the root cellar. We hook up hoses there and gravity feed into the cistern by our house. It’s our backup 🙂
We have not yet have the root cellar fully buried and vented for a summer. I’ll update later this year for what the temps are. I don’t plan on using it through the summer yet though until we can add more dirt on top.
The cistern did not need to be sealed on the outside, however, the layer of whatever it is that holds the 2 halves together was filled with some kind of water proof sealant.
The backfill is all rocks, rumble, and dirt…basically anything we needed to move around.
The filter is just a screen at the end of the pvc pipe.
I’m sure this was an undertaking for sure but it turned out nice for you I’m really in awe of the work and self reliance you guys have I’m a little bit jealous because livingin Florida no way I could have a root cellar. I love your blog.
Very interesting. You are a hard working couple, for sure.
I love the cellar,something I’d love to have built on our property for,who knows what might be a place we might have to use to hide someday.