
How to Sew a Gathering Apron
This post may contain affiliate links. Read our disclosure policy.
How to Sew a Gathering Apron
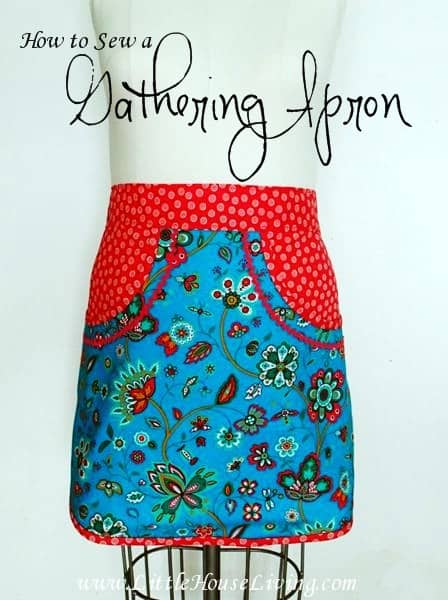
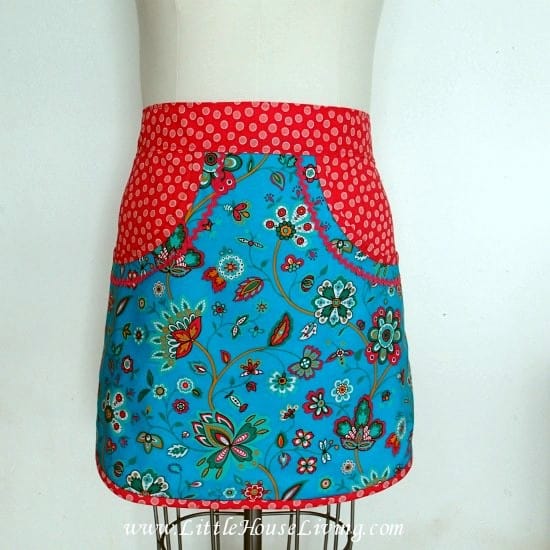
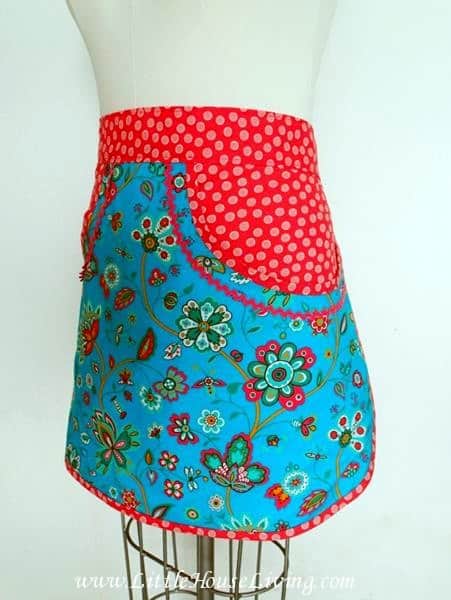
Do you feel sometimes that you have to sacrifice pretty for practical? The typical gathering apron is often one such item where it can be voluminous and particularly unflattering to wear, in order for it to fulfill its purpose of allowing you to gather produce hands-free. Today I’m sharing a compromise with you. An apron that is both pretty and practical. It perhaps won’t carry as much weight as some of the other aprons, but you’ll be happy to answer the door in this one, or even entertain guests for dinner without looking frumpy!
How to Sew a Gathering Apron
What You Need:
- 1 yard of fabric for the waist ties and back (Get it from Fabric.com)
- 1/2 yard of fabric for the front panel (Get it from Fabric.com)
- 100 inches of store bought bias tape or make your own
- Thread
- Pattern – Gathering Apron Pattern <–Download here
 <—Save this pattern for later.
To sew a gathering apron
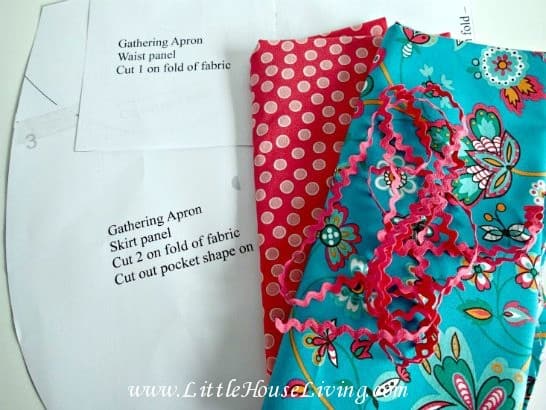
Print out and assemble your pattern and use it to cut your fabric. Both skirt panels will be the same size, but the front piece of fabric is shaped to make pockets. You can use the same pattern piece for both.
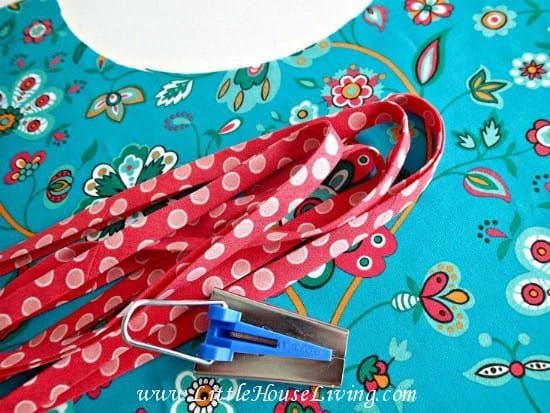
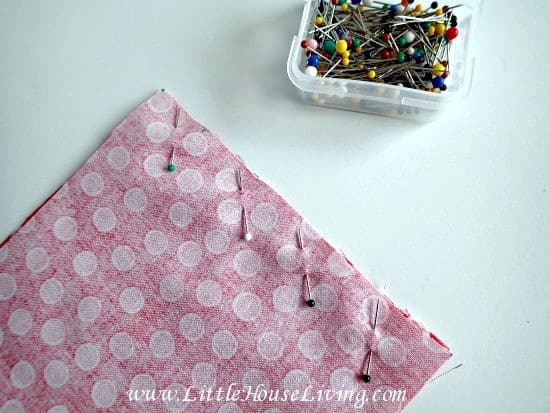
It’s fun for this project to make your own continuous bias binding, either to match the waist band or in a bright contrast. Make enough to edge the pockets and all around the outside of the apron skirt. You’ll need a total length of at least 95 inches. Cut your strips 2 inches wide in order to make double fold bias tape at 1/2 inch finished width. Use this handy bias tape calculator to help you work out what size square to start with.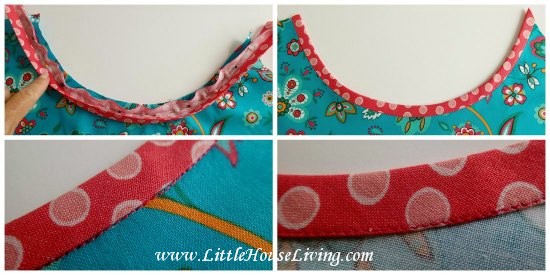
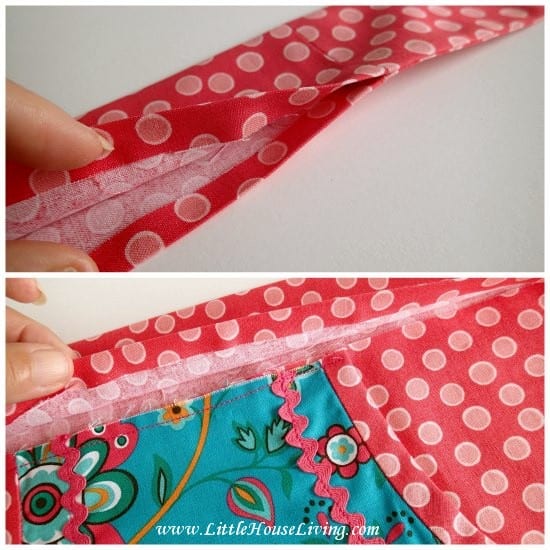
Apply your bias tape around the top of the pocket, starting from the front side, then folding the tape to the back and stitching in the ditch to catch the back of the tape in place.
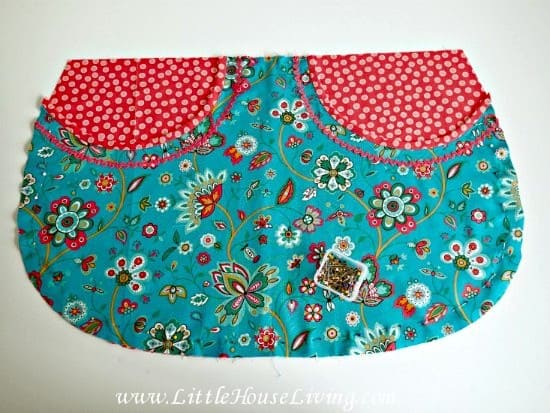
If you want to add any other embellishment, a line of bright ric-rac or a cute applique to the front of your apron, do this now.
Place the two apron pieces face up, with the pocket piece on top. Pin carefully around the edges and then baste them in place 1/4 inch from the raw edge.
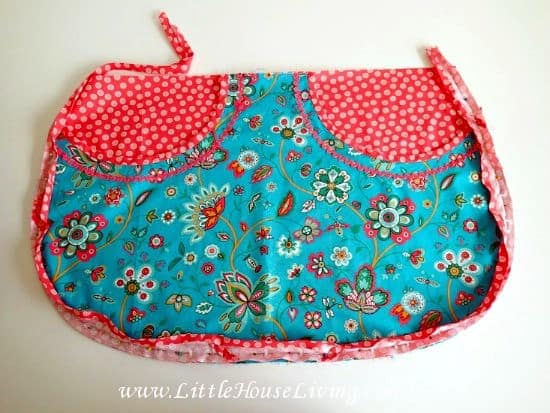
Apply the remaining bias binding around the bottom edge of the apron skirt, starting at the front and folding to the back. Make it nice and secure because this bottom seam will be holding the weight of what you collect in that big front pocket.
Now we need to think about the waist. The length of your ties will depend on your waist measurement.
As a rule of thumb: WAIST in inches, PLUS 18 and then divide by TWO.

For example – 32 inch waist, plus 18 = 50. Divide by 2 = 25. So you need to cut two waist ties for your apron each 5.5 inches wide by 25 inches long. If you want the ties to cross over at the back and tie at the front of the apron, they’ll need to be even longer. Add on half of your waist measurement again to each side. We all differ on how long we prefer our ties to be so just double check you’re happy before cutting the fabric. If in doubt make them longer, you can always shorten it later.
Attach your waist ties to each end of the waist center panel. Then fold the whole waist piece right sides together and sew around the open edges BUT leave the original waist panel unsewn. We need to add in the skirt at this point.
Turn the waist ties the right side out and give them a good press. Fold over the 1/2 inch seam allowance on the open part of the waist and press to the inside. Slip the apron skirt into this gap and pin in place.

Top stitch all the way around the waist ties, catching the skirt as you close up that gap. Reinforce the stitches at the edges where the skirt meets the waist to help take some of the weight of whatever you collect in that big front pocket.
Give everything a final press and your gathering apron is completed. Go gather and look cute doing it!
Find more fun and simple free sewing patterns on Little House Living!
What will you be gathering from your garden this summer in this apron?

Deby, this little apron is so cute and colorful and you make it sound so easy to sew. I’d most likely end up wearing it all the time, no cooking involved 🙂
Ha ha, I know. I wouldn’t want to get it stained by actually cooking in it!
Gorgeous! And wonderfully retro!
Oh I love your apron – I am currently making a pinterest board of homemade Christmas gift ideas and I’m adding this one to the list. Got to get started crafting soon because Christmas will be here in no time!
I absolutely agree! I’m just about to start on a Christmas in July feature on my own site, because by the time December comes we’re all too busy to do it then. Best to start sewing or Christmas now.
What a great idea to start Christmas in July! I think I’ll get crackin’ on that, and relieve some of the pressure of the busy holiday season. Oh, and I am soooo making one of your gathering aprons…LOVE it! Thanks for the pattern and lovely tutorial. Your sewing skills are impressive and inspiring!
Very pretty apron. I love your fabric choices. Thanks for adding the tutorial.
Love your apron. The fabric choices are bright and cheerful.
Thanks for sharing the tutorial! I think I am going to shut down this computer and go to the sewing room! You’ve inspired!
Glad to hear it Sherry. I think you’ll like it.
A great design, Deby! Lots of uses with those large pockets.
Love your apron! Here’s a twist, you could leave the top not sewed into the waist and put 2 buttons there. this would be great for clothes pins too. thank you.
Now that is a great idea! Would be perfect for holding pegs while you get the washing in and out. Thanks for sharing your ideas.
This is very cute and I’m pinning it. Thanks for sharing.
What a cute apron. Deby your amazing 🙂 Thank you for linking up to My Favorite Things Link Party. Pinned and Happy to have you.
Blush, you are too kind Laura. Thanks for pinnng.
What a cute apron, I love it! Great instructions and something I’ll be pinning to make for my daughter and me, thanks!
Hi Deby, small world…love that apron. As you say you’d be proud to wear this in company :))
Alexa, from Sydney, Australia
http://www.Alexa-asimplelife.com
Love your apron, Deby!
Great job and thanks for sharing!
Suzanne
Pinned and will be sharing on Facebook as one of our great features this week at Freedom Fridays With All My Bloggy Friends!!!
Hugs and thanks for sharing!!
Thank you for the feature Evelyn!
This is the cutest apron ever! I love the prints and colors you chose in the fabric. So pretty. Definitely not frumpy at all. Thanks so much for sharing at Inspire Me Wednesday. Featuring you in next week’s issue.
What a cute little apron. I was planning on making aprons for Christmas gifts this year and this will help out a lot. Thanks for sharing.
What a darling apron! I would love to make two of these, one for me and one for my daughter.
Thank you for stopping by the Thoughtful Spot Weekly Blog Hop this week. We hope to see you drop by our neck of the woods next week!
‘Hopping over from your feature at Threading My Way. What a wonderful pattern! We are smack in the middle of vegetable harvest season and this would be so handy! I think I will take a break from gardening chores just long enough to stitch this apron! Thank you! -Marci @ Stone Cottage Adventures
It’ll be perfect for veggie harvest Marci. Thanks for leaving a comment.
When I tried to print pattern, the test square was not 2 inches. What am I doing wrong in printing this?
Beautiful apron, my only concern, is it looks a little to ‘fitted’. If I’m gathering fruits or veggies I will need a bigger ‘holding’ area.
The Apron is adorable! I printed the pattern, but I can’t figure out what page 5 & 6 is.
thanks for your help.
Mary
I really like this idea and pattern. What do you think of making it more sturdy by backing the lightweight cotton with a medium-weight canvas or something (and using a very wide twill tape or strip of the same canvas inside the waist band/ties?
I am teaching my grand daughters how to sew. This apron will be their first machine project. I am using the full sized apron for my 13 year old, and reduced the apron size on my printer to 87% for my 9 year old, and further reduced the size to 75% for the 7 year old. It looks like it should be a nice and easy first project and the apron is just adorable.