
Tuiles – A Maple Syrup Candy Recipe
This post may contain affiliate links. Read our disclosure policy.

Looking for a new little snack to make that you haven’t made before? Tuiles are a simple, maple syrup treat that the whole family will enjoy!
Homemade Tuiles Recipe
These light, airy, crispy little treats are fun to have around. You can either make them to decorate cupcakes, ice cream, or other goodies or you can eat them for a treat.
Either way, they are simple and they look like it took you all afternoon to make them….
We discovered these cookies many years ago when I was looking for a simple, very few-ingredient recipe. These are easy to make and only use things you already have in your pantry.
What is the History of Tuiles?
Tuiles are of French origin and it’s believed that they were invented sometime during the 17th century. This very light, crisp cookie was generally arched in shape and meant to be a light delicacy.
Tuiles are named after the French word for tile as they resembled the curved roof tiles that the homes had back during the time they were first invented.
How Do You Keep the Tuiles Crisp?
Tuiles should be cooked until crisp to maintain their texture after baking and can be used to top ice cream or other desserts.
Leftover tuiles should be kept in an airtight container on the countertop and not exposed to moisture or damp air, which can make them limp.

Ingredients in Maple Syrup Tuiles Recipe
- Maple Syrup. No imitation stuff in this recipe. Your maple syrup should be 100% pure.
- Brown Sugar. Brown sugar helps caramelize the cookie, giving it its crispiness and crunch.
- Butter. The butter in this recipe should be softened so it’s easier to incorporate in the batter. You can use salted or unsalted butter.
- Flour. Plain flour is used in this recipe. All-purpose Gluten Free Flour will also work.
How to Enjoy Tuiles
You don’t need to do anything special, you can enjoy Tuiles as they are! They make a deliciously addicting cookie. Here are some other ideas:
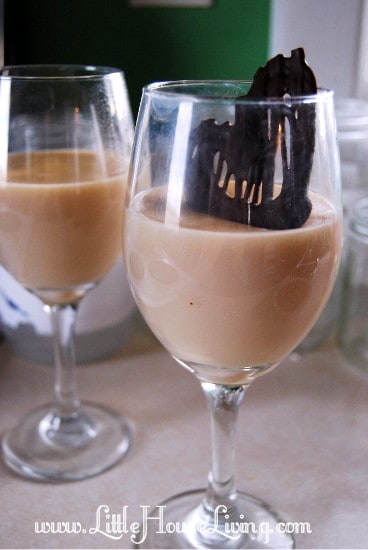
- Use them to top Chocolate Mousse.
- Melt chocolate chips and drizzle over the top (dark chocolate is really good!).
- Add a tsp vanilla extract to give it a little different flavor.
- Use them as a fancy top to Vanilla Pudding.
- Pipe patterns, dots, straight lines, or squiggles with the tuile batter instead of plain tuile circles onto your silicone sheet or baking tray.
- Add a tsp cocoa powder to the batter to make chocolate Tuiles.

Instructions for Making Tuiles
Mix together the brown sugar, butter, and maple syrup first.

You want to whip it until it’s light in color and very airy. I used the hand mixer to make it easier. You can also use a whisk.

Add in the flour with a spatula and mix until it’s all just mixed in. Stick it in the fridge to cool for a few hours until it’s workable. If you try and use it too soon, your tuiles will spread out too much.

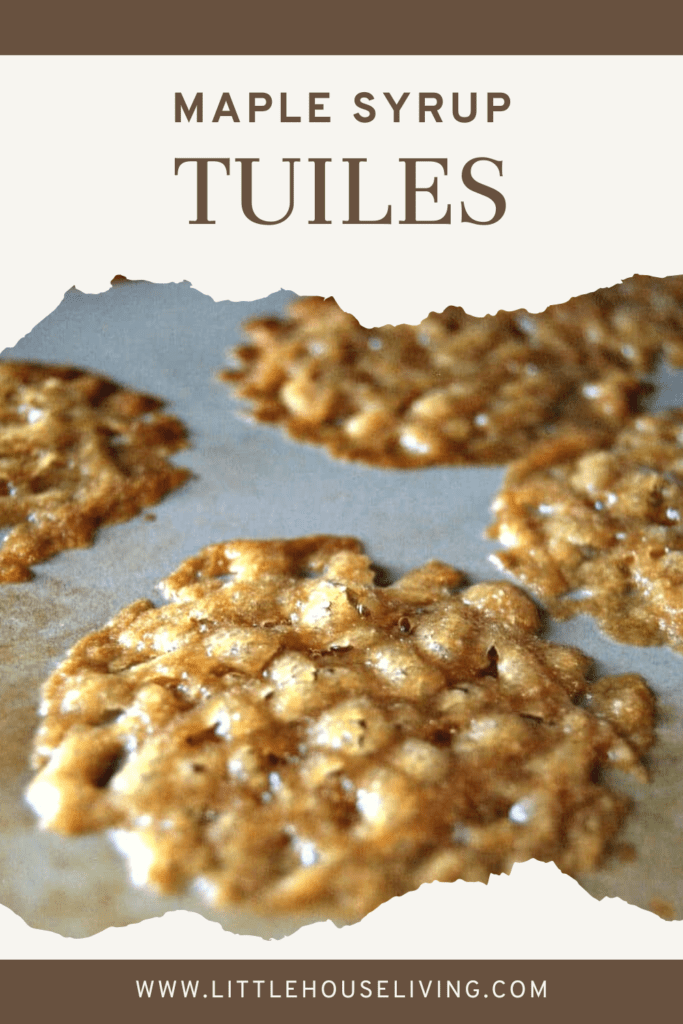
After the tuiles mixture has cooled off for a few hours, roll it into little balls the size of cherries. Put them on an ungreased baking sheet either covered with parchment paper or a silicone mat. Put them a little ways apart or they will melt together. (Don’t worry if this happens, it still tastes good!)
Bake at 400F in the oven for 7 minutes or until they get a little golden brown. After you take them out of the oven, let them cool off for a little while before you take them off the sheet or the warm tuiles will crumple together.

The hubby wanted to make the point of how light and crispy these are. They are quite pretty!

Need to print this Tuiles recipe for your Recipe Binder? Grab it below!
Maple Syrup Tuiles Recipe
Ingredients
- 1/4 cup maple syrup 100% pure
- 1/4 cup brown sugar
- 1 /4 cup butter softened
- 1/3 cup + 1 Tablespoon flour
Instructions
-
Mix together the brown sugar, butter, and maple syrup first.
-
You want to whip it until it’s light in color and very airy. I used the hand mixer.
-
Add in the flour and mix until it’s all just mixed in. Stick it in the fridge to cool for a few hours until it’s workable.
-
Roll into little balls the size of cherries. Put them on an ungreased baking sheet. Put them a little ways apart or they will melt together.(Don’t worry if this happens though, it still tastes good!) Bake at 400F for 7 minutes or until they get a little golden brown. After you take them out of the oven, let them cool off for a little while before you take them off the sheet or they will just crumple together.
This recipe is for basic, plain tuiles. I have always found this the easiest way to make them, even though it’s not the most traditional.
If you want to make them fancier, you can make the traditional curved shape by using something to fold the dough over while it’s baking. Basket shapes and cigar shapes are some other popular Tuile shapes that you might want to search to learn how to make. A basket shape can easily be made by folding the dough over the bottom of a muffin cup that has been turned upside down or patting the dough around the bottom of the muffin cup. It can also be folded over the bottom of a ramekin.
Gluten-Free Tuiles Recipe
This recipe can be made gluten-free by using All Purpose Gluten Free Flour in place of the plain flour in this recipe.
Dairy-Free Tuiles Recipe
It’s possible that this recipe could be made dairy free by replacing the butter with a vegan buttery spread alternative. I have not yet tried this, though, but I will update this post if I do!
Storing Leftover Tuiles
Leftover Tuiles that will not be used the day you make them should be stored in an airtight container on the counterop.
Any tuiles that won’t be eaten within a week should be placed in a freezer bag and stored in the freezer until ready to enjoy again. They should be thawed at room temperature.
Have you ever made Tuiles before? Will you give this recipe a try?
Did you make this recipe and enjoy it? Leave a star rating on the recipe card and be sure to share with your friends on Facebook, Twitter, Instagram, Pinterest, and through Email using the sharing buttons below!

Merissa Alink
Merissa has been blogging about and living the simple and frugal life on Little House Living since 2009 and has internationally published 2 books on the topic. You can read about Merissa’s journey from penniless to freedom on the About Page. You can send her a message any time from the Contact Page.
This recipe for Tuiles was originally posted on Little House Living in January 2011. It has been updated as of March 2026.
Yum!!! I will have to try these, THANKS!!
Shalom,
Moira
Approximately how many cookies does this make? Does grade A & B both work with this recipe or what would you recommend?
Yes, either will work in this recipe. I love grade B maple syrup in general when I can get it but I will use A as well. The amount of cookies this recipe makes will depend on the size you make them.
Can’t wait to try these. I am wondering, if the bottoms are done just enough to lift with a spatula, could they be formed into cups in a muffin tin that has been sprayed with non-stick oil? They could hold berries, or another dessert (panna cotta?) Thanks for sharing this!
Can it be done with gluten free flour. ?
Yes, I think they’d work fine with gluten free flour.