
DIY Herb Drying Screen
This post may contain affiliate links. Read our disclosure policy.

Want a place to dry herbs and other garden things using good old-fashioned solar power? It’s not hard at all to make a simple DIY Herb Drying Screen. Let me show you how we made ours!
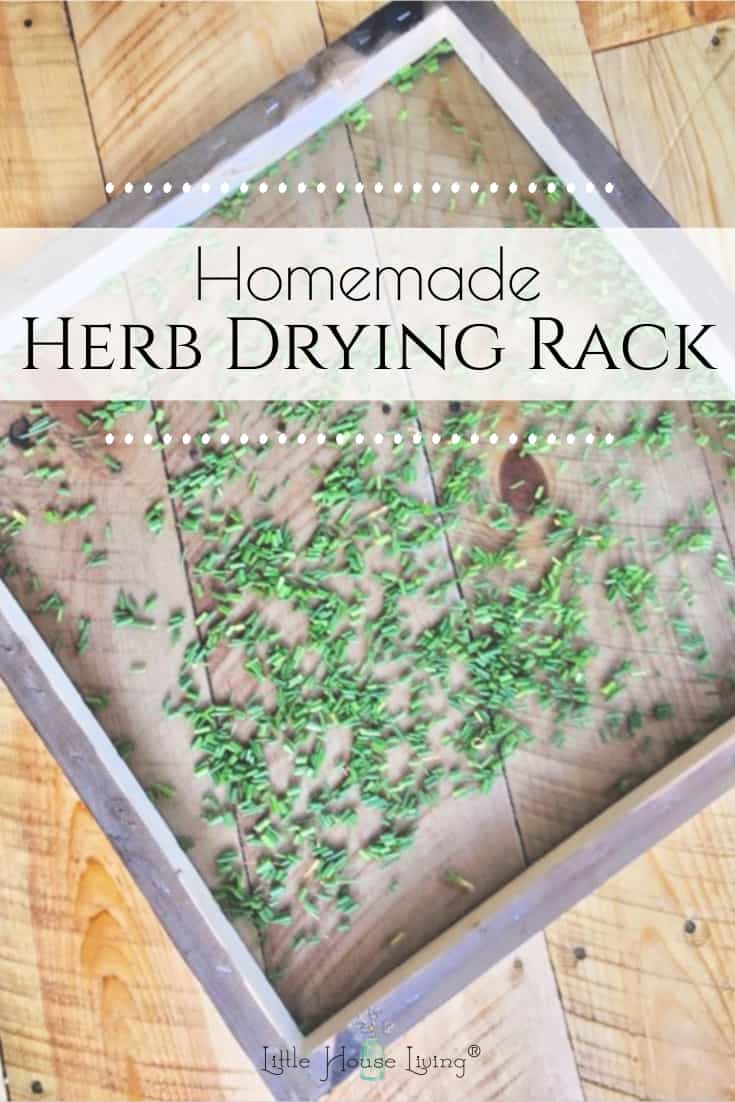
DIY Herb Drying Rack
Now that I actually have some herbs growing, I wanted to be able to dry them and preserve them to use later on in the winter. Right now we have chives and sage coming up in various spots around the yard so I want to be able to take advantage of these “freebies“!
I asked my hubby to make me a few herb drying racks so that I could take advantage of the “solar power” and dry my herbs for free without electricity. Herbs don’t really need to dry quickly so even though I have a regular food dehydrator, there is no need to use it.
So far I’m loving these simple screens! They can be made very inexpensively and are easy to use. Thanks to my hubby for making another one so that I could photograph it for you!
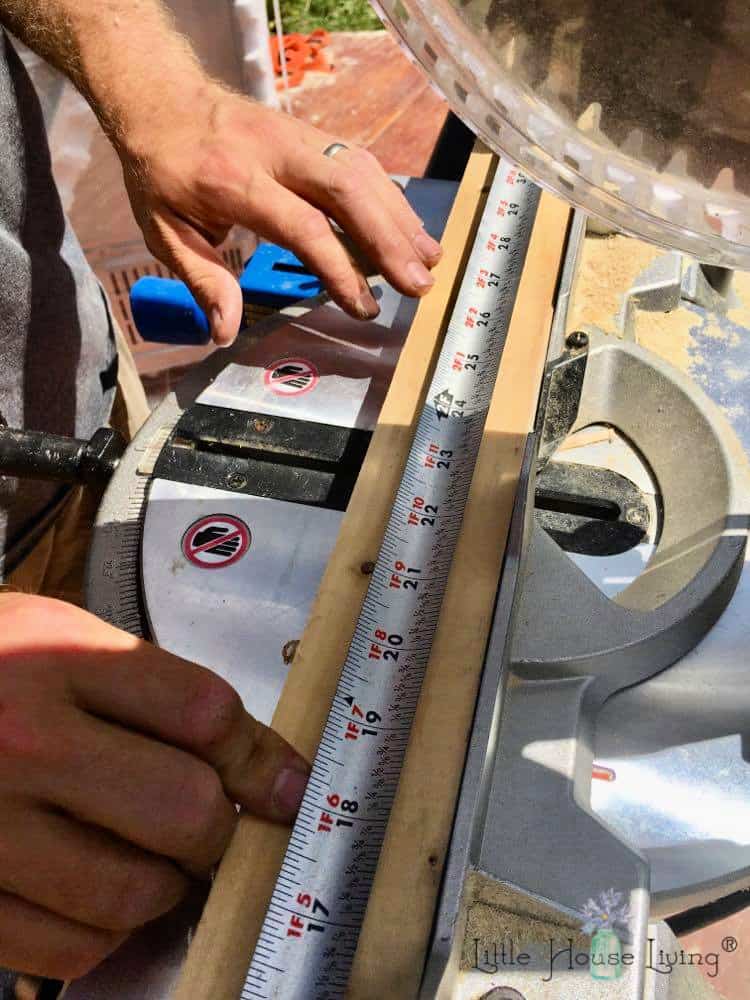
We used 1 1/2 inch wood for an herb drying rack that wouldn’t be too heavy but also would be strong and last a long time. You will need to cut 4 boards from this. We cut ours 24 inches (2 of them) and 21 inches (2 of them) to make a square. You may want to make yours smaller or larger or a different shape depending on where you want to put it.
Lay out your boards into a square (or whatever shape you’ve chosen) before you start drilling any holes.
Be sure and pre-drill the holes to avoid splitting the wood when you put the screws in.
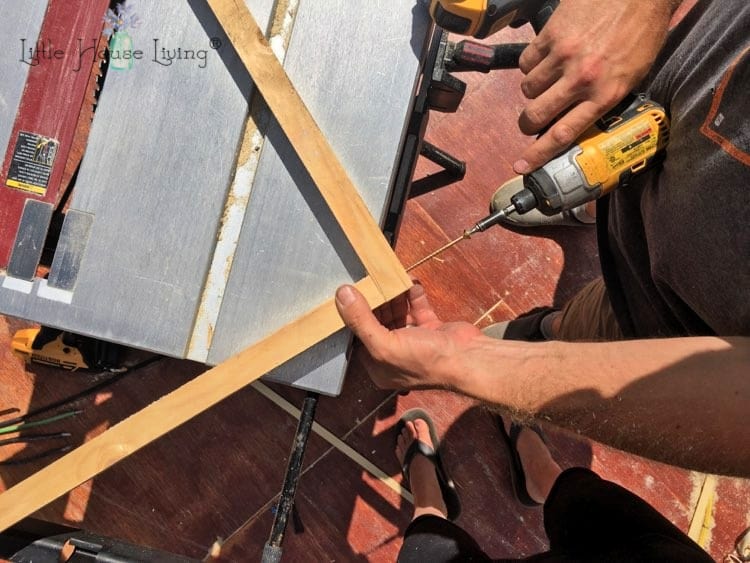
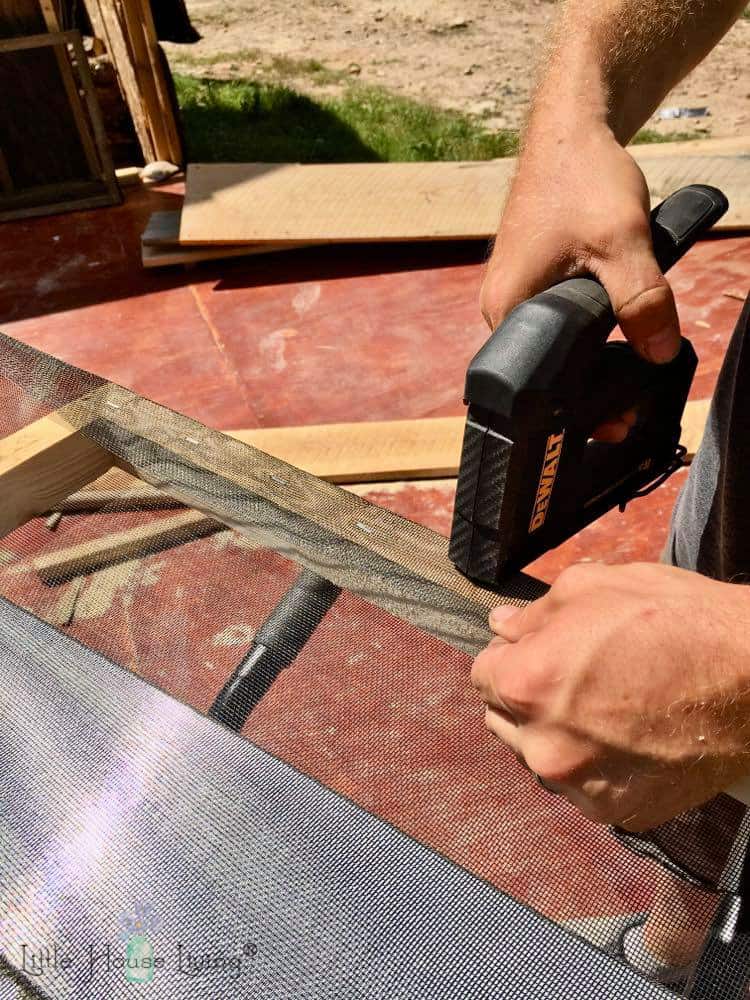
Put one screw in each board end to hold the boards together. We used 3 inch screws to hold it together well and make it stronger.
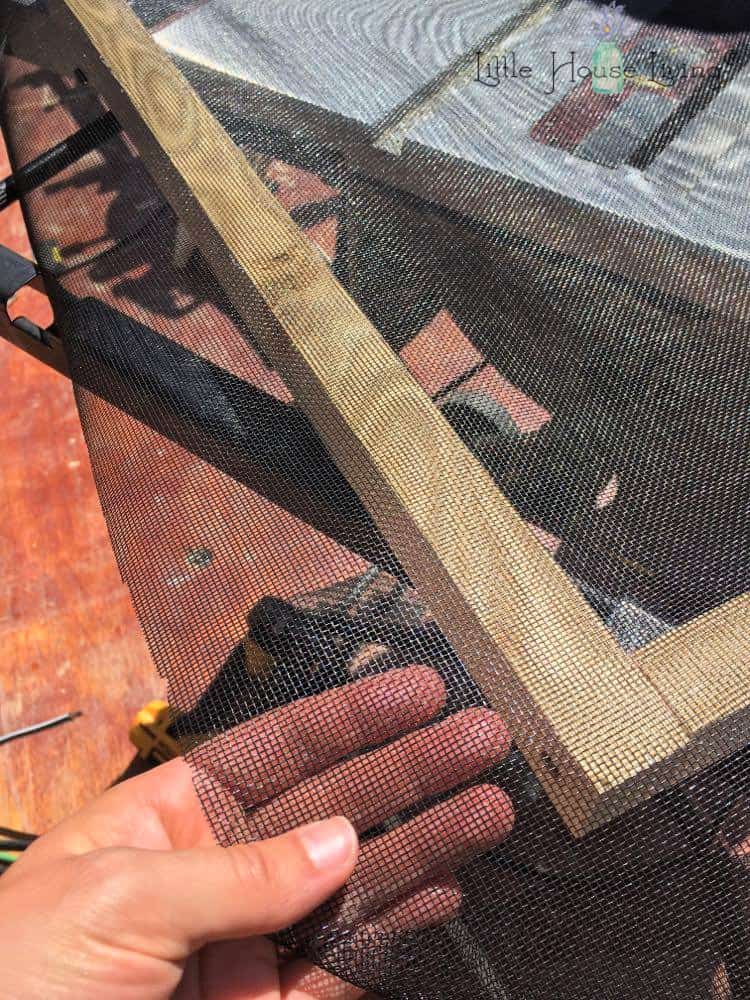
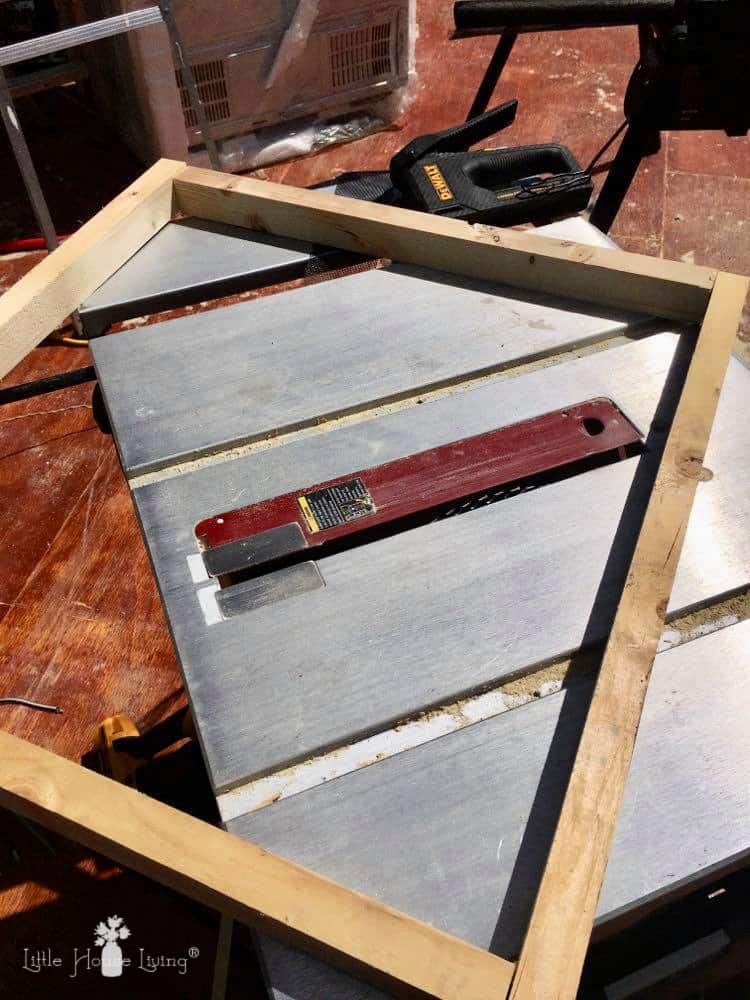
Then take your screen and measure it out. You want it to come at least 4 inches over each side of your square. If you have screens from an old window you might be able to use that but you will want it to be a plastic screen, not metal. We just bought a screen replacement roll like this one. One roll in that size made us 2 large drying racks with some leftover for another project.
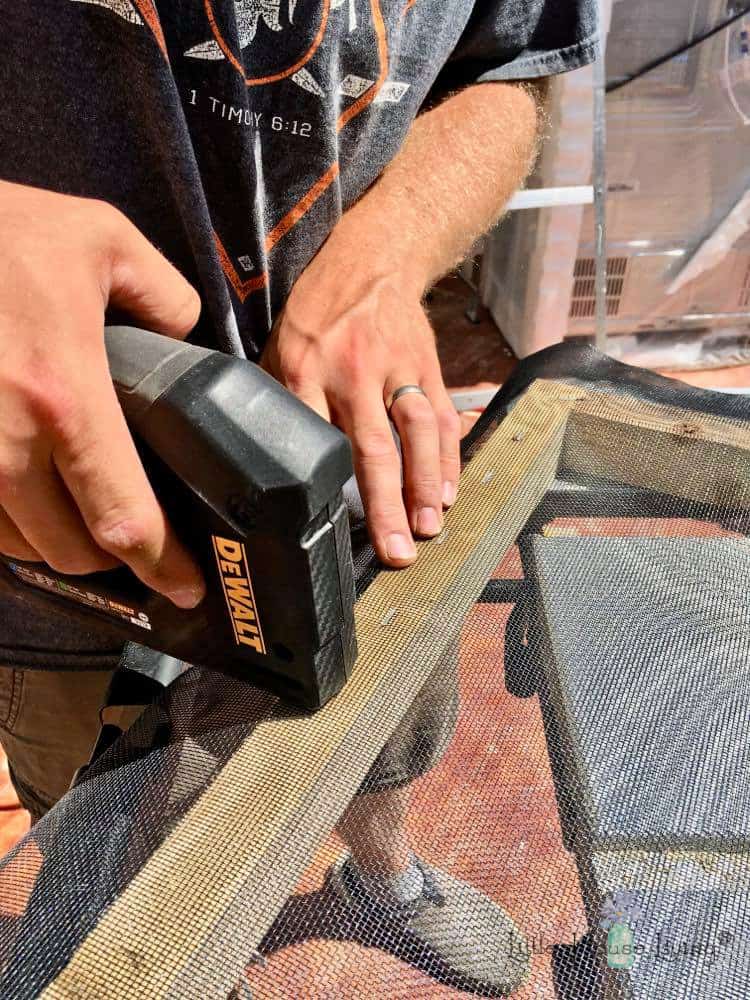
Use a heavy-duty staple gun to staple the screen to the wood. We have this Dewalt Staple Gun.
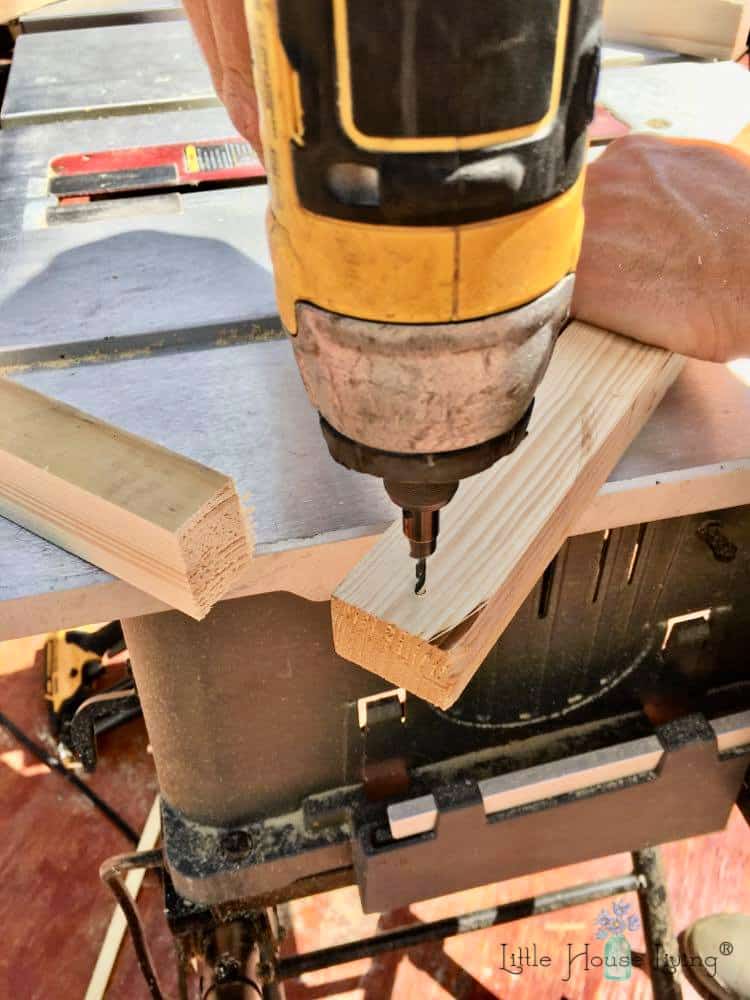
Once you’ve done 2 of the edges, be sure and pull just a bit of the last 2 edges to make sure the screen is tight. Don’t pull too hard so that the staples are straining on the screen.
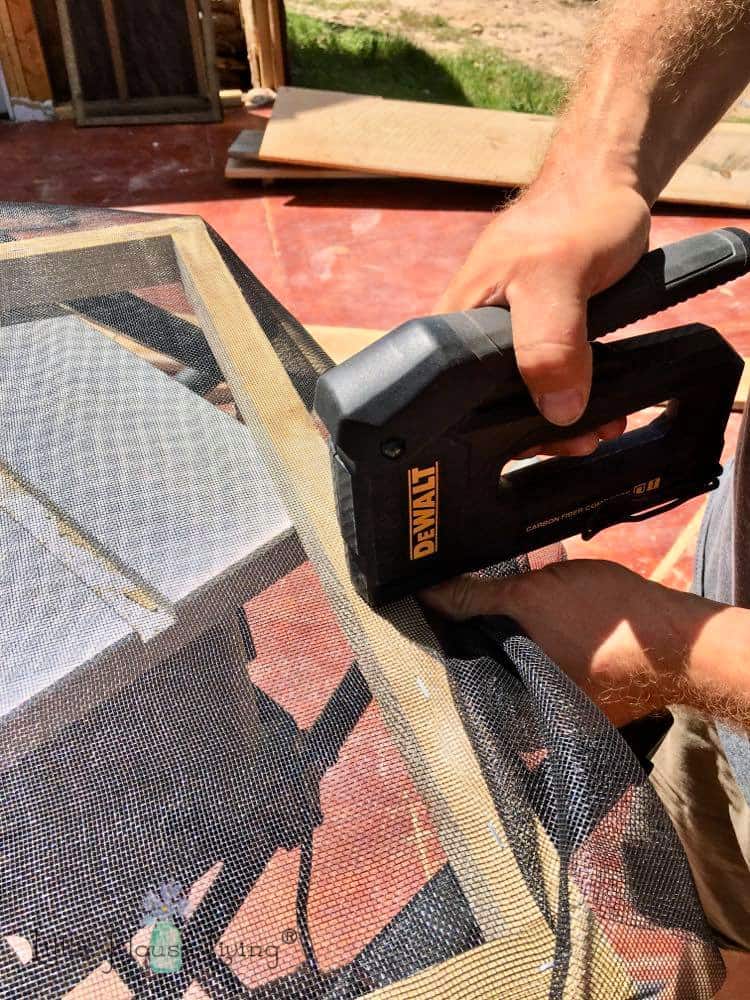
Flip the drying rack over and wrap the screen around the edges of the wooden boards and staple on the other side. This will help to make it extra strong.

Fold the corners of the screen over like this before stapling.
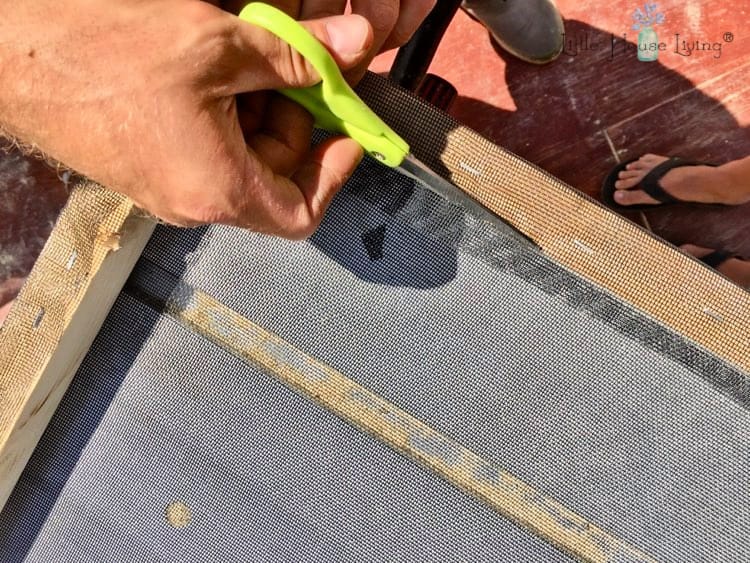
Cut the excess screen off the top of the herb drying rack. Now your drying rack is done and ready to be used!
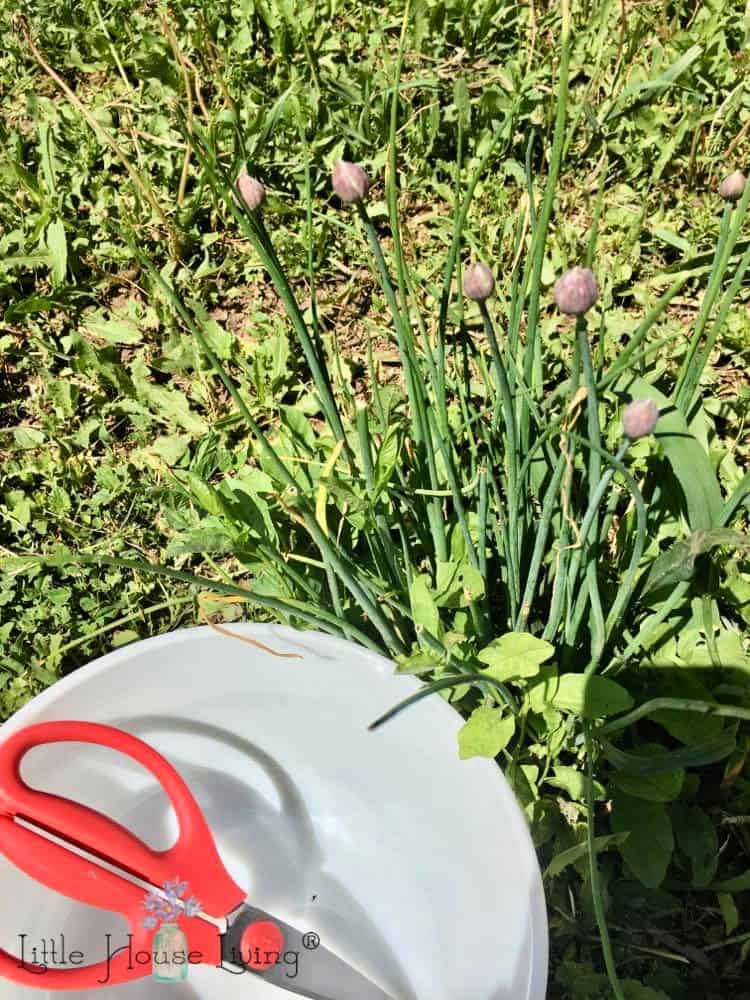
I decided to start mine with some chives since they were the first to be ready and are growing all over the place.
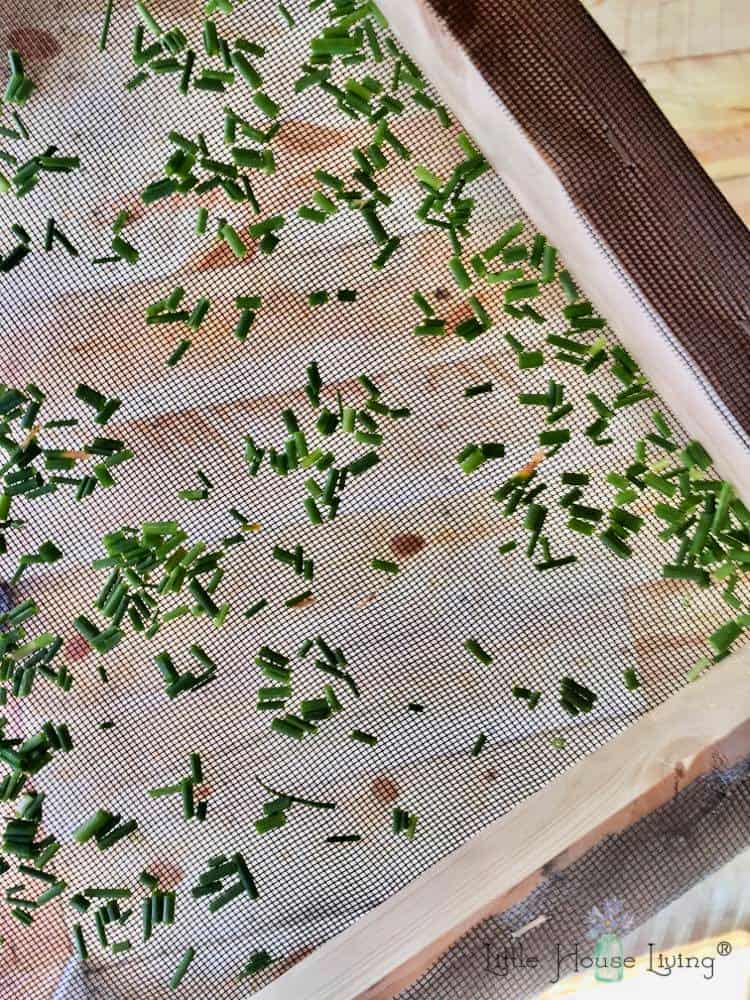
Wash and trim your herbs and place them on the drying rack. Try and set the rack up off a flat surface or make at least 2 racks and put one on top of the other and then switch them back and forth.
Not sure how to use all those herbs you are drying? Here are some tips:
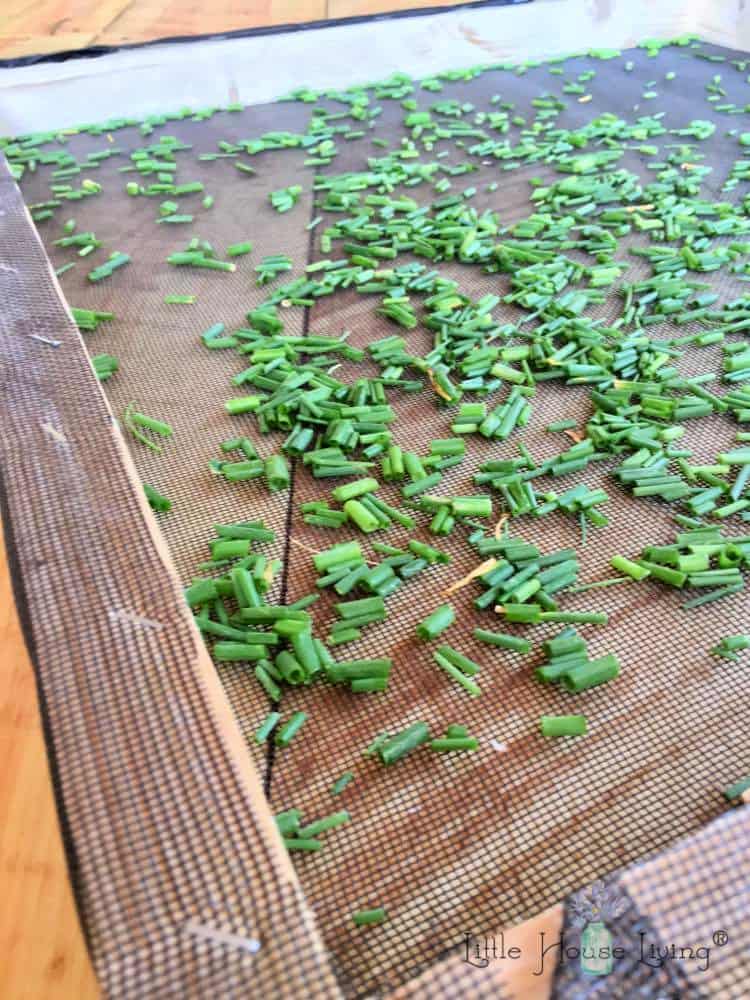
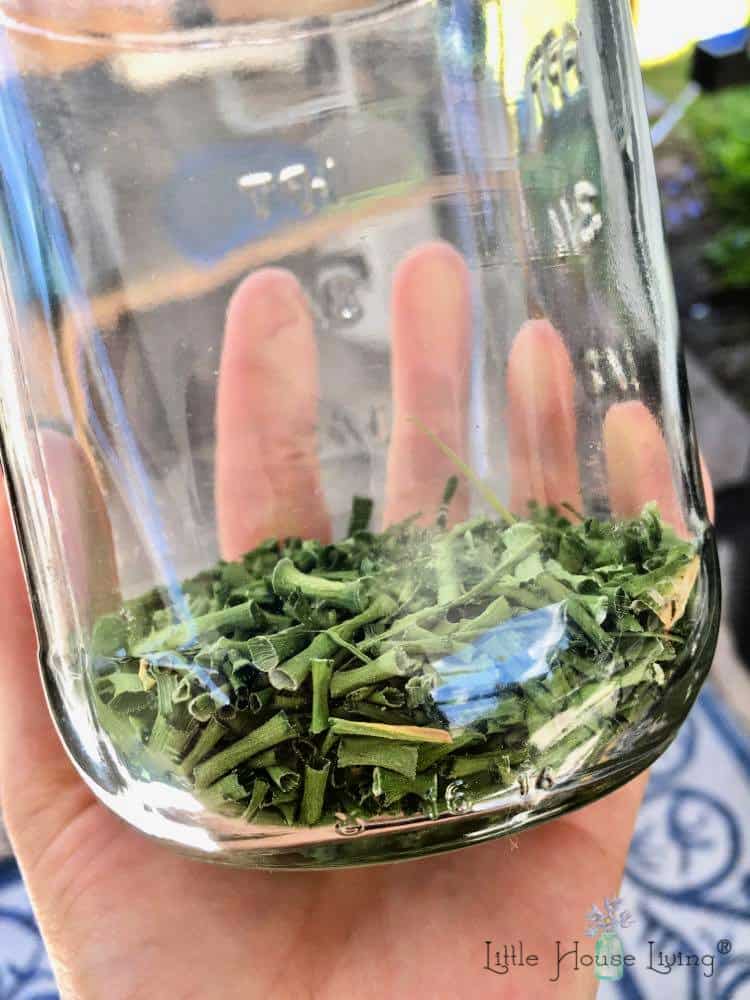
Let them dry in the sun until they are completely dried out. Then you can store them in a mason jar with an airtight lid. That’s all there is to it!
Each drying rack cost us about $4 in the screen. You might be able to find it cheaper. We used wood that we already had from building our house so no extra cost there but you may add a few dollars for the wood. Overall, this is a very inexpensive project and the drying racks should last for many years when put together solidly and stored in a good place when not in use.
Need another project to work on? Here are some of my favorites that we’ve done:
- How to Build a Mini Greenhouse for Free
- Simple DIY Garden Projects
- DIY Cold Storage and Frugal Root Cellar Ideas
Do you dry your own herbs?

Merissa Alink
Merissa has been blogging about and living the simple and frugal life on Little House Living since 2009 and has internationally published 2 books on the topic. You can read about Merissa’s journey from penniless to freedom on the About Page. You can send her a message any time from the Contact Page.
This article on how to make an herb drying screen was originally published in June of 2020. It has been updated as of February 2026.
About how long did it take for your herbs to completely dry out?
I dried them on some hot days and they were ready to be put away in 2 days. If you are drying them in a more humid area it will probably take longer.
This is good, I would like to check out this, thanks for sharing 🙂
If you have a basement, in the fall or even now, herbs such as parsley, oregano, etc. similar can be tied with a string or rubber band and hung from nails from rafters in the basement or barn to dry. It would be the same principle used for flowers. The screens at this time of year are a good alternative. I just need to keep the chipmunks away !
We live in the humid south so it will probably take a few days. Did you put your drying rack indoors during the night?
Yes I did.
Thanks for the info, we haven’t got a dehydrator so this is handy to know, and thanks Doe (see above reply) for the other tip. With our UK weather you never know what we’ll get, having said that, we have a heatwave at the moment, with temps in the 30’s!!
Did you cover with a thin tea towel when drying? With bugs, birds, and pets in our yard and deck, I wouldn’t leave mine uncovered.
I didn’t, but if you have things that might be blowing about during the day you might want to cover lightly.
I see you said you bring the racks in at night. Any need to concern yourself with bugs or other critters getting into them while they are outside during the day? No need to cover them with something?
I’m not really concerned with bugs getting in them or anything else during the day. We just have some kind of creature that roams our camp at night (some kind of cat?) and I’d rather she didn’t sit on my herbs 🙂
Merissa, I’ve actually seen plans online for making a wooden stand that holds your homemade screens. It’s a wooden frame, which either has legs or is made to hang. Screen is stapled all around the frame that holds your drying screens and it has a screen door. You just open the door and put in or take out your drying screens. It keeps bugs off of your food while it’s drying, especially tomatoes. It was a nice set up.
By the way, can you please add me to your ministry e-mail list?
Our ministry list is on hold at the moment as we are building our homestead. We will probably start it up again late fall. 🙂
Hello! I was wondering why plastic and not metal screen? I have read alot that using stainless steel mesh is best, so I am curious to hear your opinion on the matter. Thanks for the article and fabulous instructional pictures!
You can use anything you like! I would be concerned about rust on a metal screen. Stainless steel would be different if you could find that.
thank you! I’m going to do it!