
How to Make Affordable Felt Flower Embellishments
This post may contain affiliate links. Read our disclosure policy.
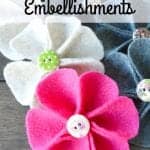
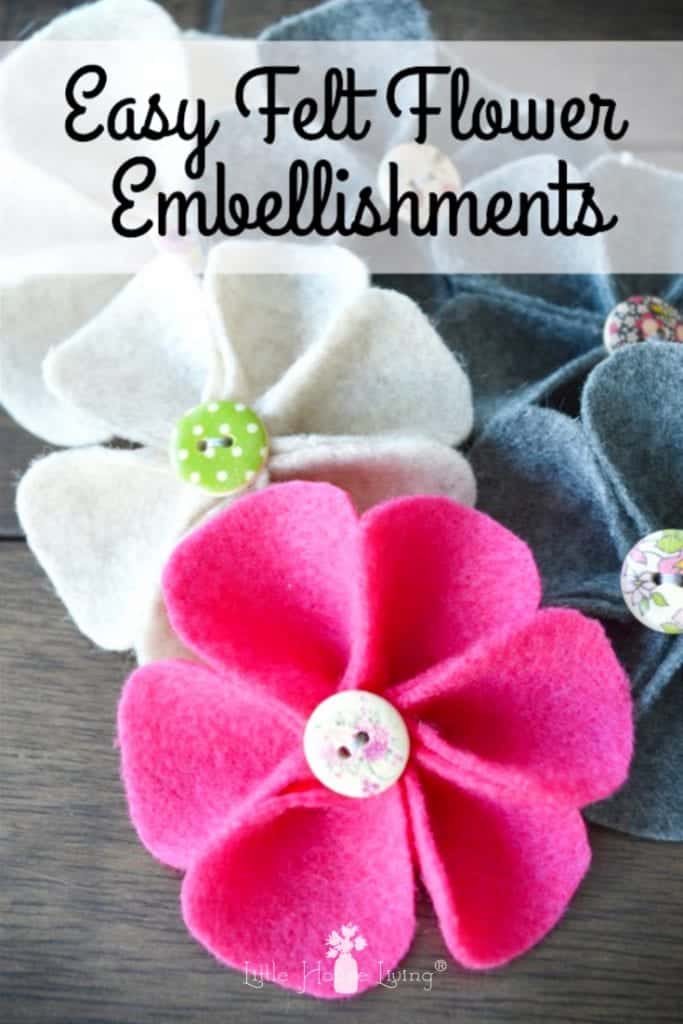
Learn How to Make Felt Flowers with this easy tutorial and pattern. These cute and affordable embellishments add an extra special touch to headbands or clothes and have endless possibilities.
How to Make Felt Flowers
Earlier this winter I was working on some little headbands that I could wear out in the cold. I’m usually sporting a ponytail or a bun so hats aren’t my friends, but I love a good warm headband.
After putting together the simple headbands I decided that it would be cute to dress them up a little bit just for fun so I started making these little Felt Flower embellishments for them. They are really simple to make and only take about 10 minutes. Plus they are inexpensive to make since I made them out of felt. You could use these to decorate a host of sewing projects or maybe some other kind of decorative piece around your home, the possibilities are endless! Here’s how I made these affordable felt flower embellishments.
DIY Felt Flower Embellishments
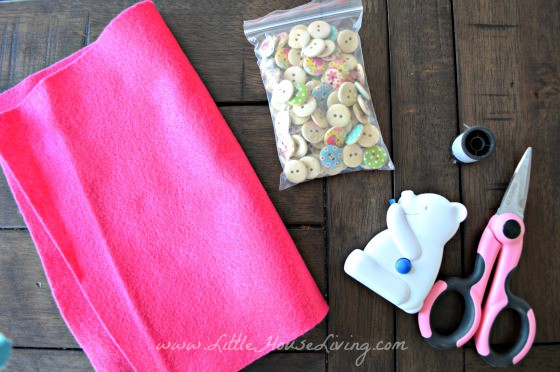
What You Need:
- Regular Felt (not the stiff kind)
- Buttons
- Needle and Thread
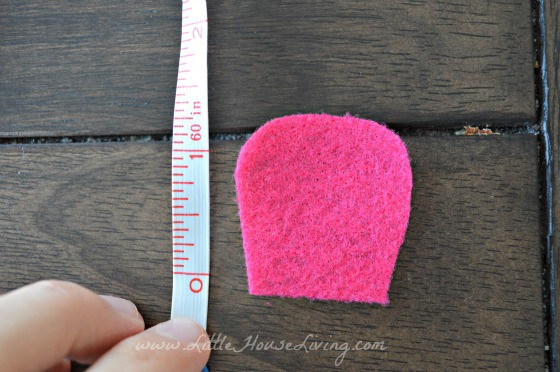
Start by cutting a shape out of felt that looks like this. Flat on the bottom and rounded edges around the top. (It almost looks like a horsehoe or an upside down U shape.) The size will depend on how large you want the finished product to be. The flowers I made for my headbands are about 2 inches across so each petal is about 1 inch long. If you are using them to make a banner or other decor piece, you will want to make them larger.
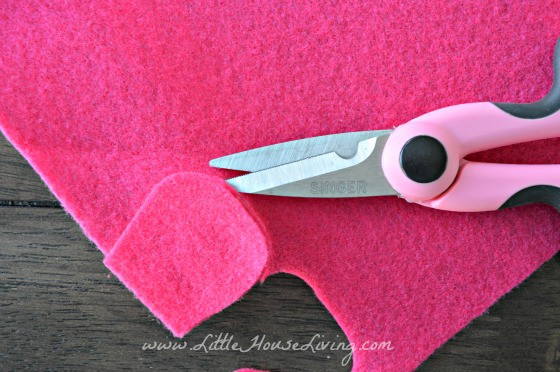
Use that first piece as a pattern to cut out a total of 6 petals.
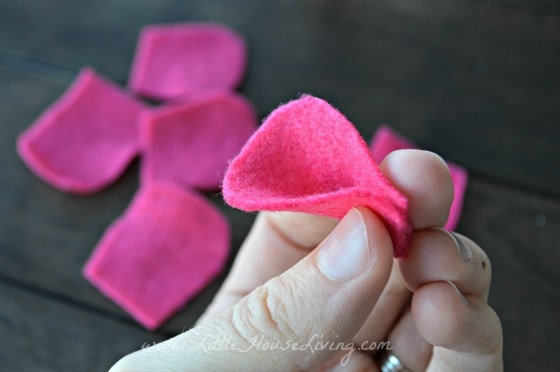
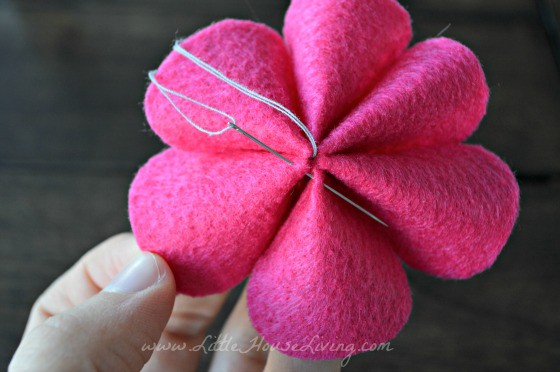
Thread your needle and tie a knot at the other end of the thread. Fold one of the petals in half and hold it between your fingers as you can see in the image above.
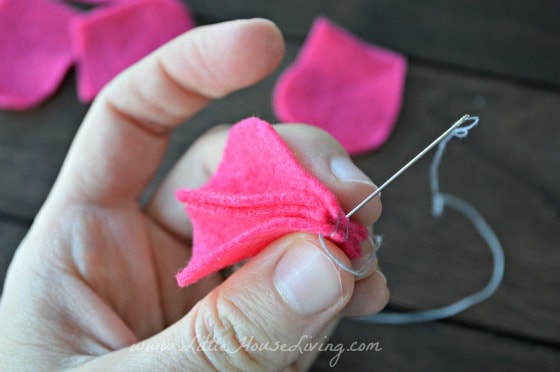
Take another petal and do the same, right next to the first petal. Use your needle and thread to sew a few whip stitches to keep them together.
Continue pinching each of the petal pieces of the flowers and whip stitching them together until they are all sewn together.
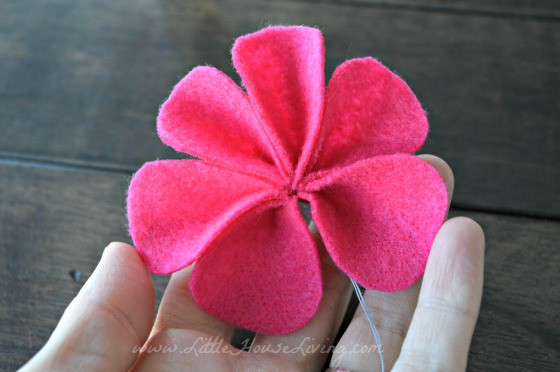
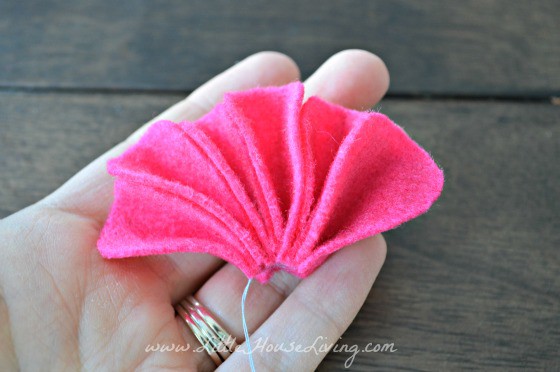
Use your fingers to connect the 2 end petals and create a circle.
Use one or two stitches on the back of the flower to connect these two petals together.
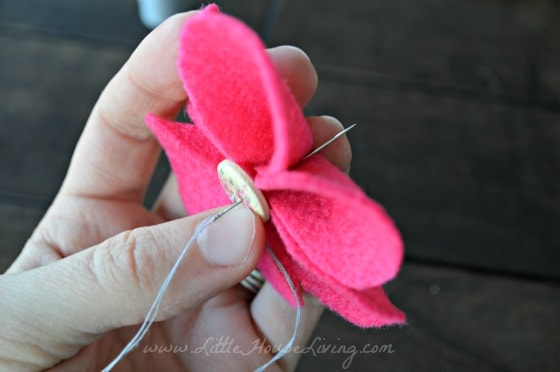
Now that our flower is complete, we need to add in a center. Find a matching or contrasting button and add it right to the middle of the flower. Knot the thread once the button is secure and cut off any excess.

That’s all there is to it! Now you can sew or glue your easy felt flowers onto anything you like and you have a cute little embellishment! One piece of felt (which costs around $0.20) can make at least 5 flowers, depending on the size you make them. I found these cute little wooden buttons on Amazon for cheap.
Fun Ways to Use Felt Flowers
Headband – This is how I plan to use my flowers, they really add a cute, feminine touch to headbands. You could also use them on hats.
–Learn How to Sew a Headband.
Clothes – These flowers can be used to embellish any type of clothing. They would also make a really fun 100th day of school shirt, although making 100 of them could take a while. 😉
–You could even add these to an Infinity Scarf.
Bags – Add a sweet little touch to your Reusable Market Tote Bag
Banners – Make some banners for birthdays, baby showers, weddings and more by stringing several of these together. You can also add in some triangles with handwritten or stitched letters or some letter cutouts in between your flowers.
Kid Crafts– These flowers are so easy, anyone can do them with a little guidance. It’s a great way to let your kids work on their beginning whip stitch and they’ll love making them in various colors and finding creative uses for them!
–Here are some more crafts that are great for kids – 9 Incredibly Easy Kids Fleece Projects
Picture Frames – Looking to add a small embellishment to the corner of your picture frames? These felt flowers would be perfect!
If you enjoyed using this felt flower pattern, here are some more patterns you may want to try:
- Towel Baby Bib Pattern
- Soothing Lavender Eye Pillow Pattern
- Homemade Cloth Pads Tutorial and Pattern
- 10 Minute Simple Baby Receiving Blanket Pattern
- Homemade Hand Towel Pattern and Tutorial
- DIY Cloth Napkins and Un-Paper Towels
- No Pattern Apron
Find more Free Printable Sewing Patterns on Little House Living.
What will you use these easy felt flowers to make?

This tutorial on How to Make Felt Flowers was originally published on Little House Living in January 2015. It has been updated as of January 2020.
Cute felt flowers – thanks for sharing how to make them. Stopping by from Craftastic Monday.
So cute! I will be pinning this for sure! Thanks for the idea!
These are super cute! Thanks for the tutorial! 🙂
These are adorable! Thank you for sharing your posts with us this week for Brag About It! Pinned and tweeted.
These are too cute and you have posted lovley clear instructions, my daughter has a birthday party coming up and I think I’m going to make some of these for the girls.
Ooh I love these, they’re so easy& gorgeous and would work on so many things. Thanks for sharing. #BrilliantBlogPosts
Angela x
Hi Merissa
I have only recently discovered your website and am so pleased I have. Being a pensioner in the UK is hard, but with your very inexpensive diy projects, I can at last make things for my Granddaughter (12 years old). I think she will love these felt flowers and I shall attempt to make a head band for her.
Many thanks for sharing your ideas.
Kind regards
These felt flowers are so cute. Love the idea and your tutorial is great.
Thanks for sharing at Turn it Up Tuesday,
Bev
So cute! I have some scraps of felt lying around that would make pretty little flowers! Thanks for linking up with Merry Monday last week 🙂
These are awesome! I love felt flowers! Holly
These are such pretty flowers! I can think of some fun ways to use them. Thanks for sharing your easy tutorial.
These are so pretty Merissa – thanks for sharing! A little safety pin in the back would create really simple brooches for the kids to make.