
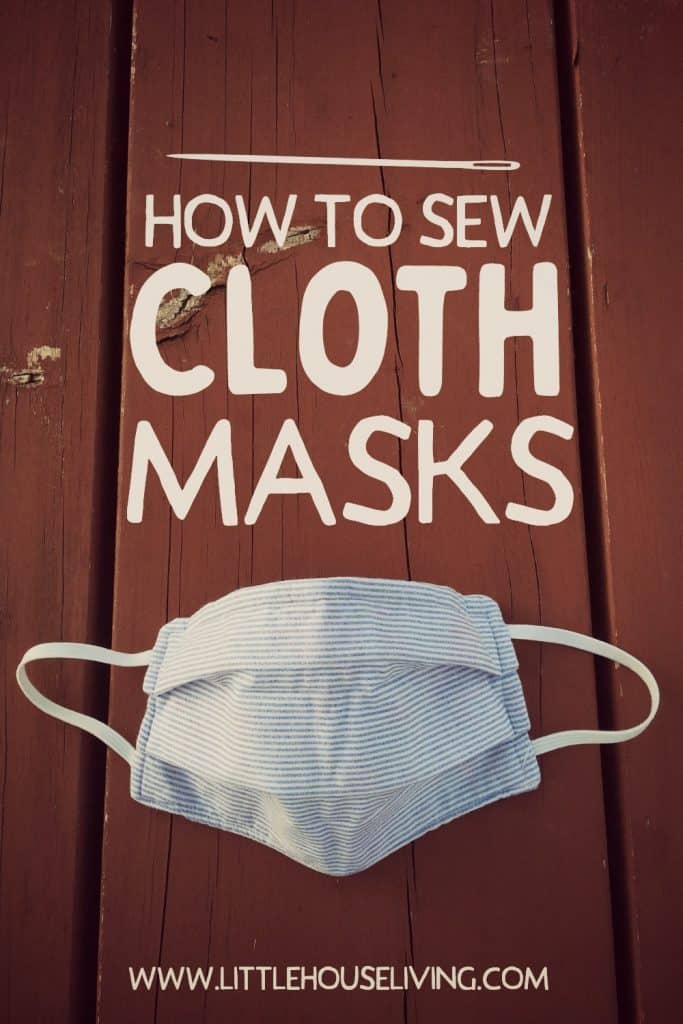
How to Sew Cloth Masks – Make Your Own Cloth Face Masks
This post may contain affiliate links. Read our disclosure policy.
Are you looking for an easy and frugal way to make masks? Learn how to sew your own cloth masks with this simple tutorial.
DIY Cloth Masks
Many people are looking into making masks for themselves and their families during this time. I am going to give you what I have found to be the most efficient way of making cloth masks.
I have tried making about 6 different styles of cloth masks and have problem-solved this a few different ways. I tried using bias tape (3 different ways) but none of them were quick or easy. Not to mention it ended up becoming quite costly. I also tried the flipping inside out method shown in most tutorials but they never came out looking as nice as I wanted. I sew clothing as a side job so I don’t feel it was a lack of ability on my end. I hope that this tutorial will give you a simple and efficient way of making masks for your family and friends and healthcare workers in your area.
**Note: It’s important to remember that cloth masks will not provide virus protection however they are recommended to be worn at this time to help you remember to not touch your face when out in public.
—New to sewing? Check out my 7 Sewing Must-Haves List before you get started!
How to Sew Cloth Masks
Required Fabric and notions:
- 2 layers of 100% cotton fabric (if you are new to sewing think quilt fabric or bed sheets)
- 1 layer flannel (yep, just like a flannel shirt)
- 2 pieces of 1/8 or ¼ inch elastic cut to 7 inches in length
- Optional wire for a nose piece (Garden wire, pipe cleaner, or even two twisty ties will work)
Frugal options could include a cut up old flannel shirt, an extra bedsheet, or one of those matching pillow shams or bed skirt that no one ever uses. As far as elastic, you could use one of those thin elastic headbands cut into two halves. Or you could sew in a 15 inch long pieces of ribbon and use those as ties instead.
—Find more great ideas for Where to Buy Cheap Fabric.
Alright, let’s jump in!
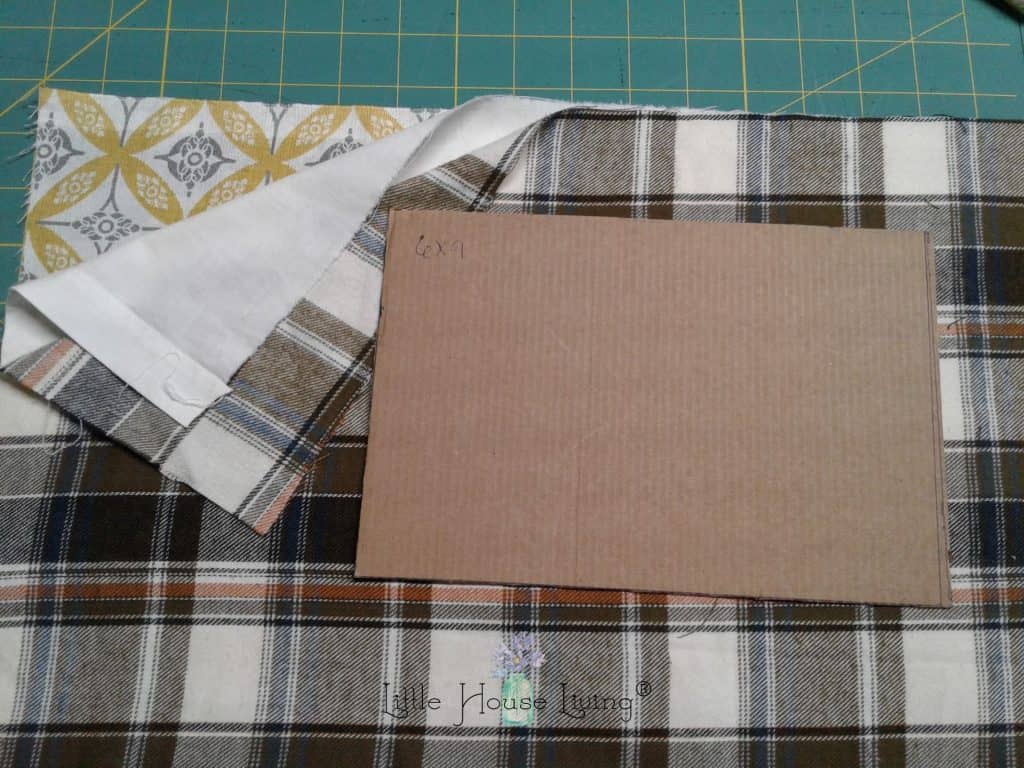
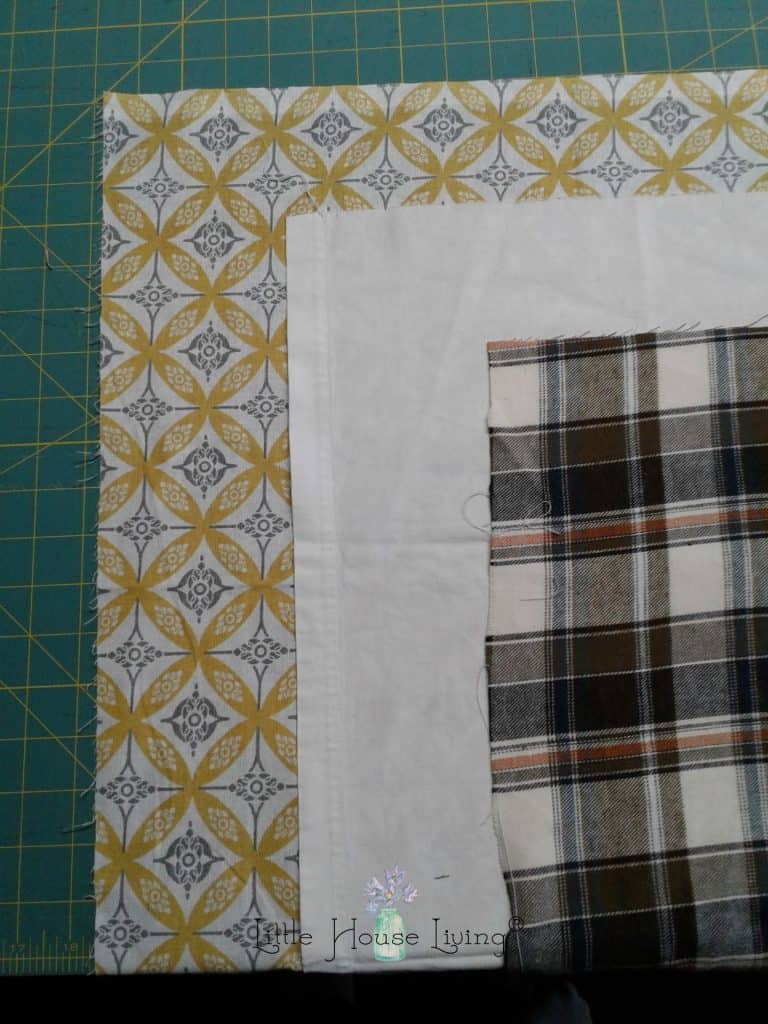
Step 1: Cut a 9 inch by 6-inch rectangle from all 3 fabrics.
If you want to make a small child’s mask, you will cut the fabric in a 6″x6″ square and the elastic to 5″ pieces. Child’s sizes vary a lot, so you may need to adjust the elastic length or use ribbon to make ties.
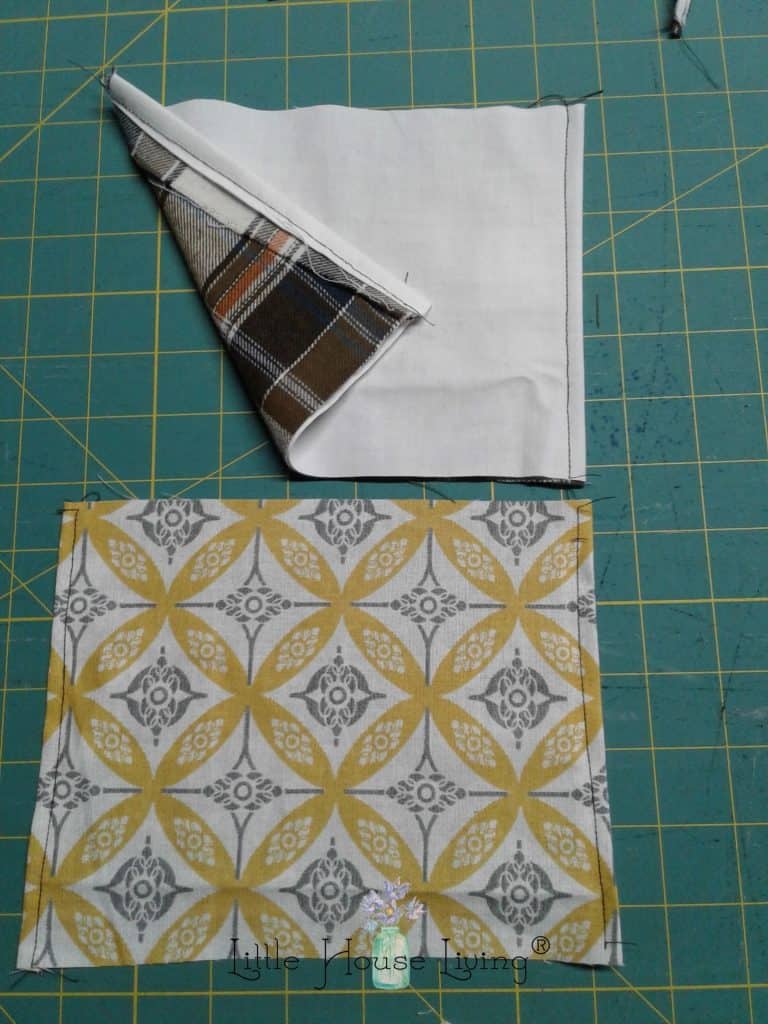
Step 2: Hem the short edge.
Fold under the short edges of the “outer fabric” and stitch to hem. Place “lining fabric” and flannel TOGETHER and fold under the short edges as one and stitch to hem. See the above photo. When you are finished, you will now have 2 pieces to your mask instead of 3 pieces since 2 layers are now joined together.
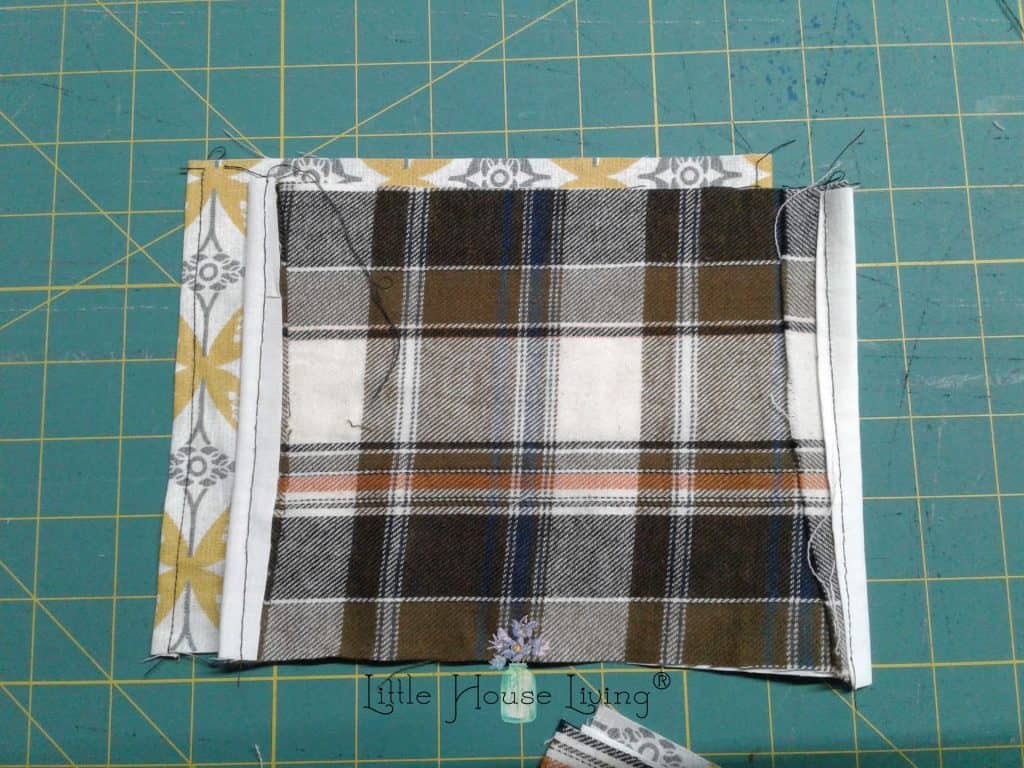
Step 3: Line up the two pieces directly on top of each other with the pattern sides facing each other.
The photo shows them offset so you can see how to lay them down but you want the edges all lined up together.
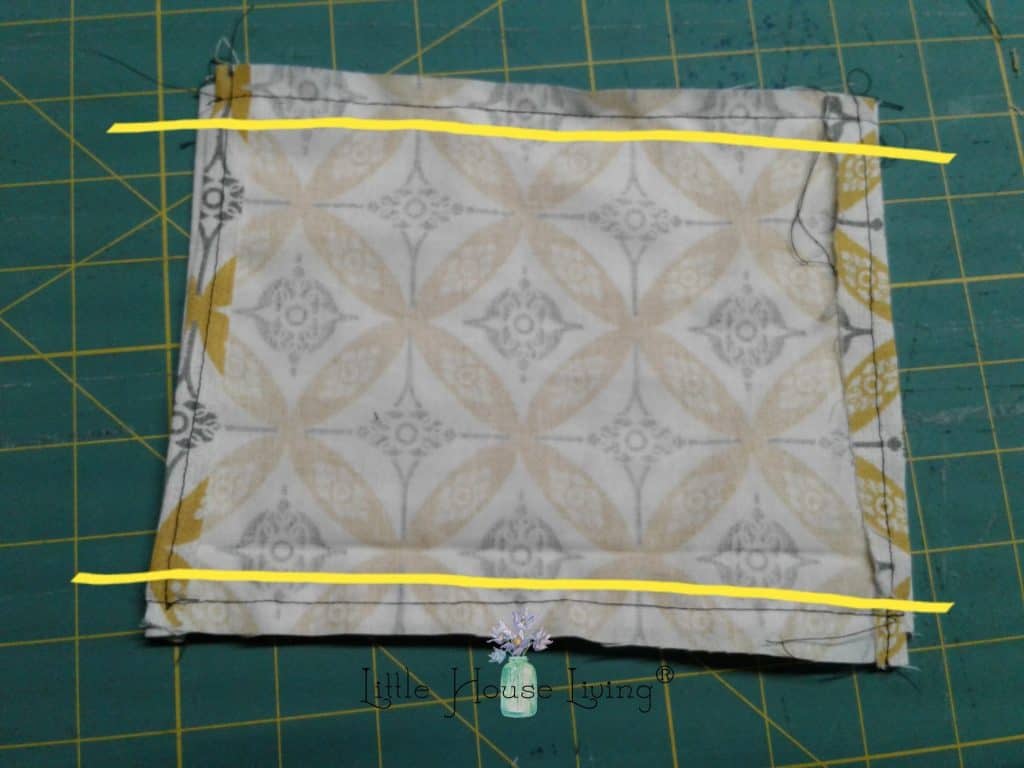
Step 4: Stitch the two pieces together ONLY along the LONG edge.
I highlighted this with yellow lines so it wouldn’t be confusing.
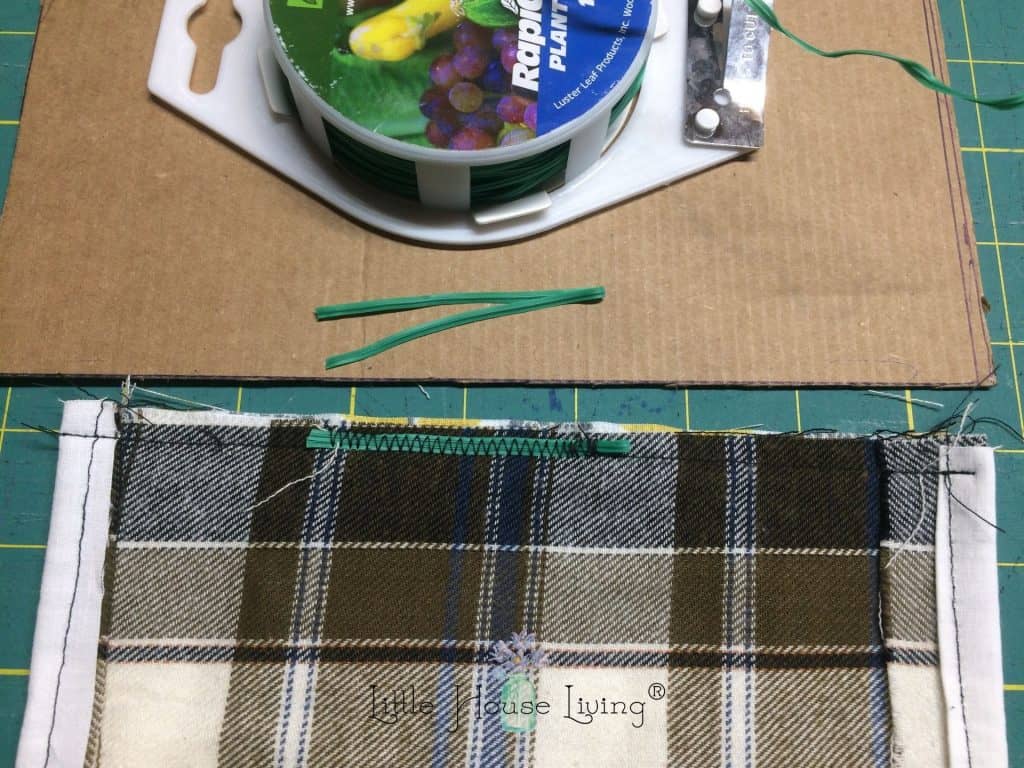
Step 5 (optional): Nose wire
If you would like wire over the nose to form your mask to your face more, you can use this type of garden wire that is plastic coated. I found if you double it that it works better. You could also try two twisty ties or even a pipe cleaner but be sure to turn any sharp ends in so that they don’t poke out of the fabric or poke you. Place it in the center or above the stitching and zigzag over the wire to keep it in place.
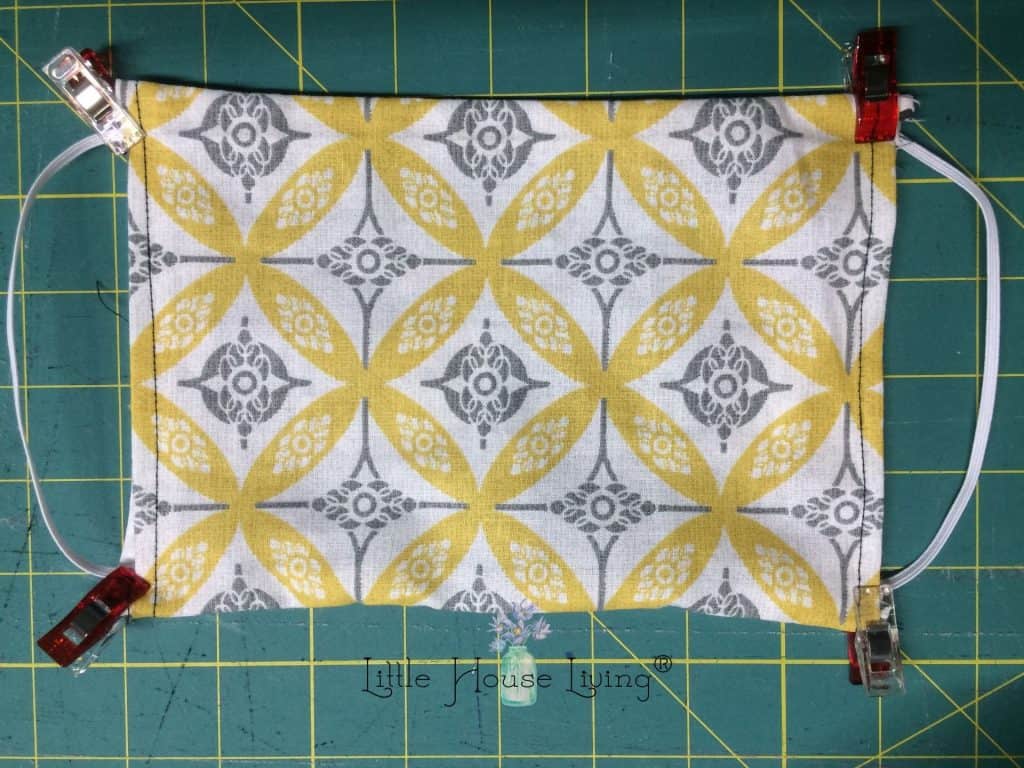
Step 6: Flip the mask right sides out and pin elastic in.
Once you flip your mask inside out, you can take the two pieces of 7-inch long elastic and begin to pin them into place. I’ve seen bulldog paper clips work well to hold the elastic in place as well. Slip the elastic between the two layers of fabric making sure to put at least a quarter to half-inch into the pocket. Keeping the elastic closer to the corners makes a much better mask in the end than if they are an inch or two closer to the center.

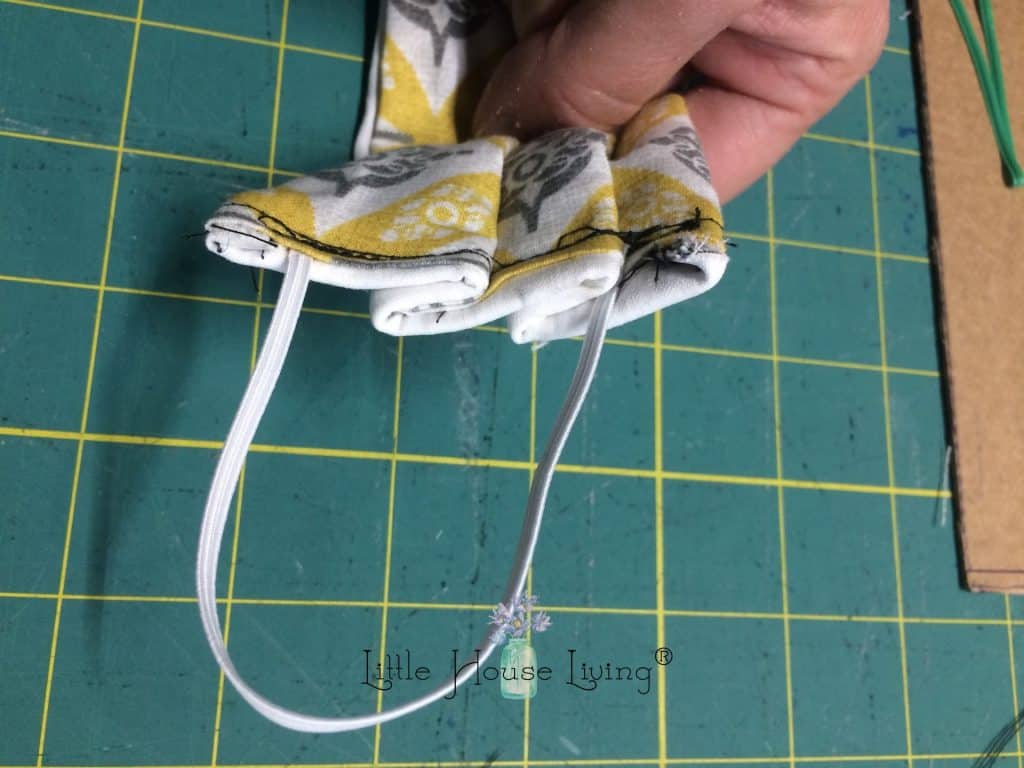
Step 7: Sew the elastic and close the side seams.
I know this picture isn’t the best drawing ever but I wanted you to be able to see where to go when you are sewing. Begin sewing the short side seam closed being sure to go over and back several times over the elastic to be sure it is sewn in good and strong. Make sure when you are sewing over the elastic that there is elastic on both sides of your stitching. You want a tail after you sew over it. If you sew just at the tip of the elastic piece, it will come loose easily.
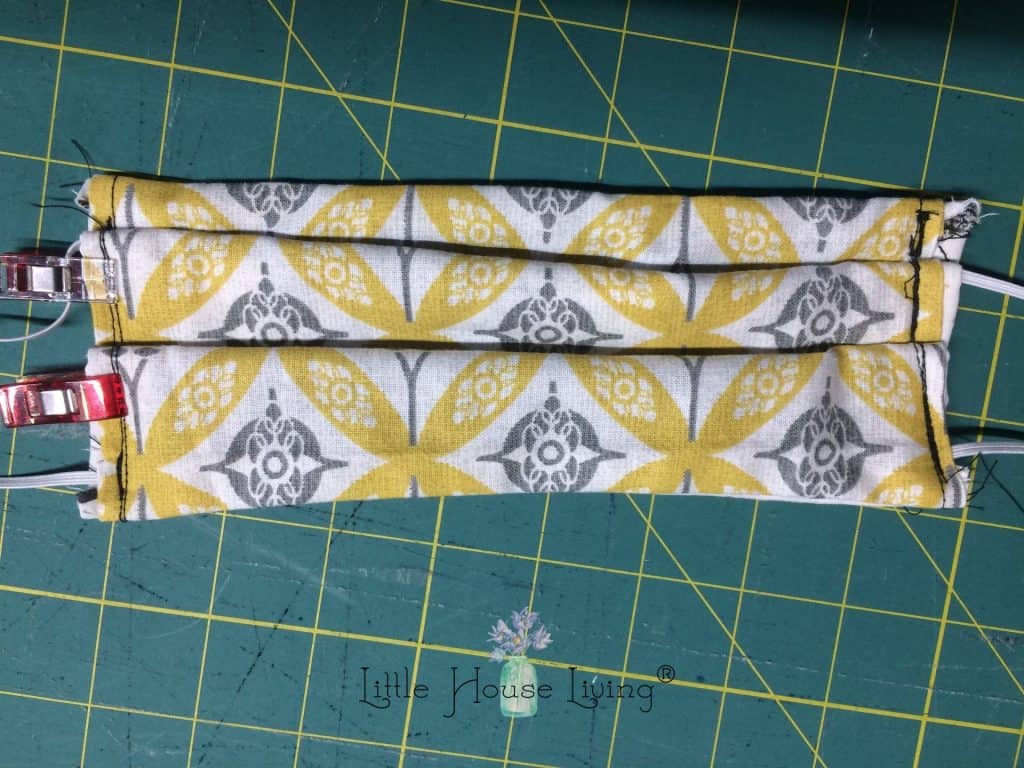
Step 8: Pin the pleats (folds)
Fold your fabric so that there are 2 folds like the ones in the picture above. The exact locations of the folds don’t matter too much. If you look at the lines on the green mat in the photo above, each of those squares is an inch. The finished measurement of the side of your mask once it’s folded should be around 3 inches give or take a little. You can see it’s close to 3 squares wide in this photo.
Step 9: Sew the pleats (folds) in place.
For your final step, sew slowly! This is a thick bunch of fabric and some machines just don’t like to go through that much at once. Be patient and go slowly so you don’t break a needle. Stitch straight down over the folds to hold them in place.
Note: As you can tell if you use a thread color that doesn’t match there is a lot of stitching that is visible and it really doesn’t look great. So if you want yours to look cleaner than this, use a matching or less visible thread. This works well for you all to see but doesn’t look the nicest that’s for certain.
—Limit your time in stores, learn Everything You Need to Know About Buying in Bulk.
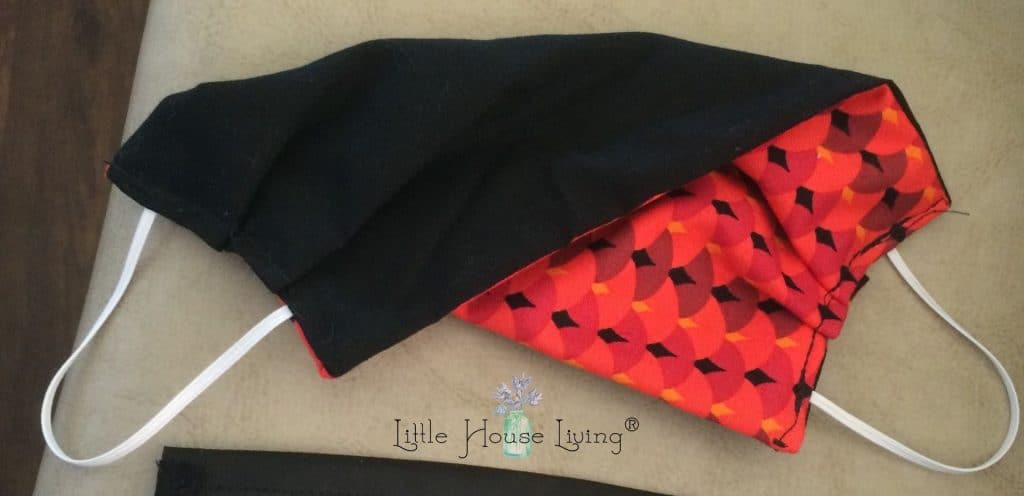
Here’s one that looks a little nicer since you can’t see all of the stitching.
Congratulations!!! You are Finished!!!
It may seem like a lot of steps but it really doesn’t take long at all. If you have kids, put them to work cutting out rectangles, elastic, and nose wires. They can be flipping masks inside out while you sew up the next one and my kids have even been able to clip the pleats down in place for me. Anyone you can get to help do a few of the non-sewing steps will help so much! It makes the work much more fun!
Here are some other sewing projects to work on next:
- DIY Cloth Napkins and Un-Paper Towels
- Homemade Baby Wipes Tutorial
- Little Sewing Projects You Can Do in Your Spare Time
- How to Sew a Gathering Apron
- Easy Bag Holder Sewing Pattern
- Homemade Sandwich Bags Sewing Tutorial
- 10 Minute Simple Baby Receiving Blanket Pattern
- 45+ Free Simple Sewing Patterns
Have you made your own cloth face masks?
My name is Kelly Nussbaum. I am a follower of Jesus Christ, married to a wonderful man, and the mother of 5 fun children ranging in ages from 12 years down to 3 years old. I have been a stay at home mom for 12 years and have been homeschooling for the last 8 years.
Do you have a recipe or article to share? Send Merissa Your Best Tips and you could be published!
Thank You so very much for this!!
Hi!! I have been making masks for my family a d friends. I have had a lot of trouble finding the elastic for the ears. Since it’s and order from our mayor to wear make when out in public.
Everything in the stores like material, matting, thread, needles and elastic no sores have any in stock. I did find some pony tail elastics which are way too small. So I’ll see what I can use instead. Yes I can make the ties with material, but I rather not. Ha!! Not lazy it’s just better to have the elastic.
I used the elastic from an old fitted sheet. Working great!
If these masks dont prevent the virus from coming through, do we need 3 layers of fabric? Also, is there something we can put in between the layers to prevent the virus from coming through?
Use a number 4 cone coffee filter or an ac/heat filter that is for allergy sufferers & be sure to get the one for allergies & viruses. Vacumn cleaner bags – HEPA – are also being used.
I didn’t have garden wire or twist ties. So, I made my own…. I took a piece of heavy duty tin foil about 4”x4” and rolled it tightly on a thin round bamboo skewer, slipped it off and pressed it down and folded in half, and folded the very ends. I think it’s better because it won’t rust or tear through fabric when washing.
I used a foil pan for the nose bridge. Just round the corners, and once the mask is turned outside out, you can actually insert the 1 1/4 x 4-inch piece and sew through the tin and don’t have to make a pocket to hold it in place..
Is there anyway you can put the diy face mask on differently because the sides cut off of the instructions, thank you!
THe post issue should be fixed now.
Thanks for the Instructable 🙂
I have been making The Hong Kong mask (for pattern and instructable see youtube)now for 2 weeks; its a little bit more work than your version but my neighbours were very happy with it. I use plasticcoated copperwire(it won’t rust in the washingmachine and we still had boxes full of it laying around) I also had loads of new soft cotton cord my hubby had bought for creative work with the childrensclub of church which are to extra to bind around your head apart from the elastics for the ears. We use kitchenpaper or coffefilters here in Germany to put between the 2 layers. Luckely I have big closet full of cloth to make masks from; I used a Ikeacurtain for the first 20 masks and now some cottoncloth. This afternoon I brought some to the familyhome next to me(who have 10 adresses) and was pleased to find out more people are sewingmasks 🙂 I am going to sew on until I run out of elastic. In our city there is a place were people donate and take home material to sew at home for the retirementhomes; students deliver the masks; its wonderful to see how people work together-on a safe distant- to help each other.
Esther: Could you please give me youtuber name? I have been searching, but cant find an actual pattern. Thank you!
How much is a hem on these masks 1/4 ” or 1/2 ” ??
I used the elastic from an old fitted sheet. Working great!
You can use nwpp which is what some shopping bags are made of. Just make sure to not buy “coated”. N95’s are made from nwpp. I hear vacuum bags are hard to breathe through. Has anyone tried them?
Can I use fabric softener sheets in between the fabric
I wouldn’t. The scent would be overpowering for the wearer.