
Make Your Own Homemade Cereal – Cinnamon Toast Crunch
This post may contain affiliate links. Read our disclosure policy.
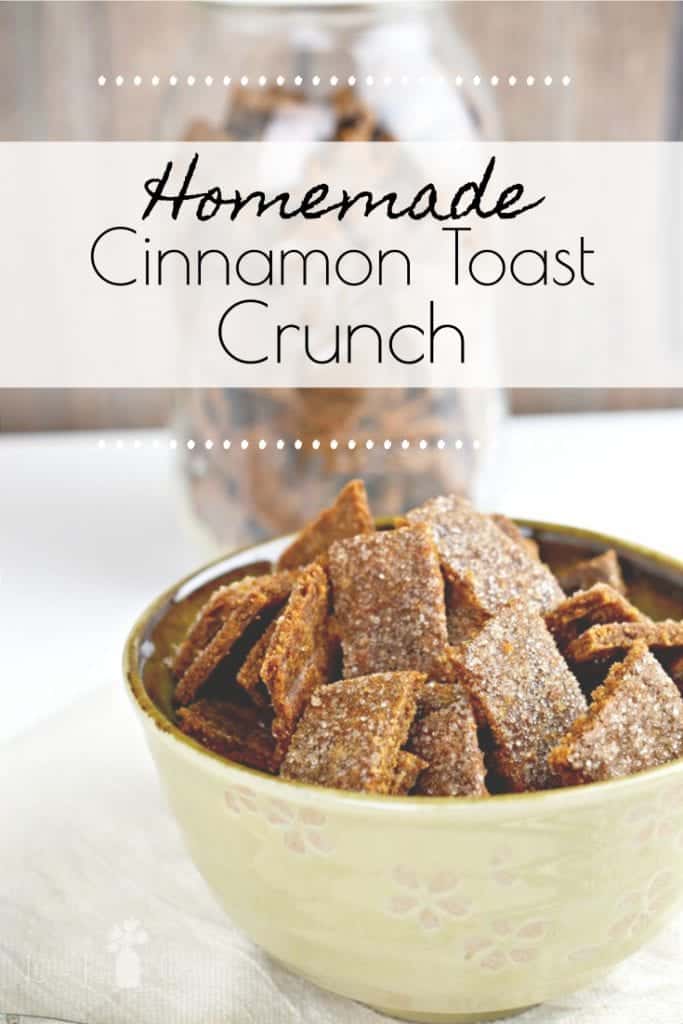
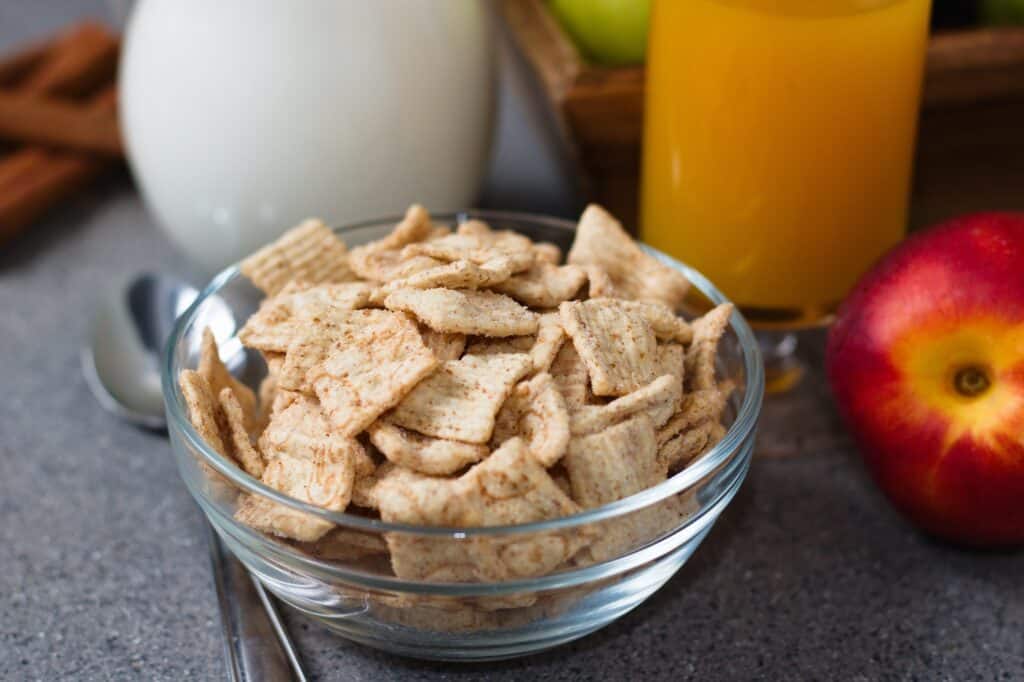
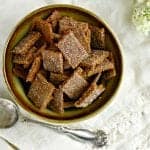
Breakfast is the most important meal of the day, make it special by learning how to make your own homemade cereal with this Cinnamon Toast Crunch recipe!
Making your own homemade cereal isn’t a difficult venture. All you need are a few basic pantry staple ingredients and you’ll never have to buy cereal from the store again.
Make Your Own Homemade Cereal
In our home, breakfast really is the most important meal of the day. Ever since my babies were old enough to understand the concept of breakfast, I’ve tried to make it a delicious, but peaceful morning time that we spend together. I usually like to make a big breakfast…bacon or Homemade Sausage, pancakes with Blueberry Sauce, or a delicious quick bread like Banana Bread. I light a few Beeswax Candles, play some soft comforting music, and let everyone slowly wake up for the day.
But some days, that just isn’t possible. We are in a hurry to get out the door for an appointment or on town day and we just don’t have time for an overdrawn breakfast. I’m no perfect mom, I feed my kids cereal on occasion for breakfast (although usually with some kind of protein and fresh fruit otherwise it’s just not filling enough for my boys!) but I don’t always keep it on hand since it’s not a “regular” breakfast staple.
Instead of buying more, I’ve been experimenting with learning how to make cereal. Turns out, it’s much easier than you would imagine! The homemade Cinnamon Toast Crunch like cereal I’m sharing with you today is so easy to make. If you can make Homemade Crackers, you can easily make your own cereal. Even if you aren’t a big fan of cereal for breakfast, this makes a great afternoon snack!
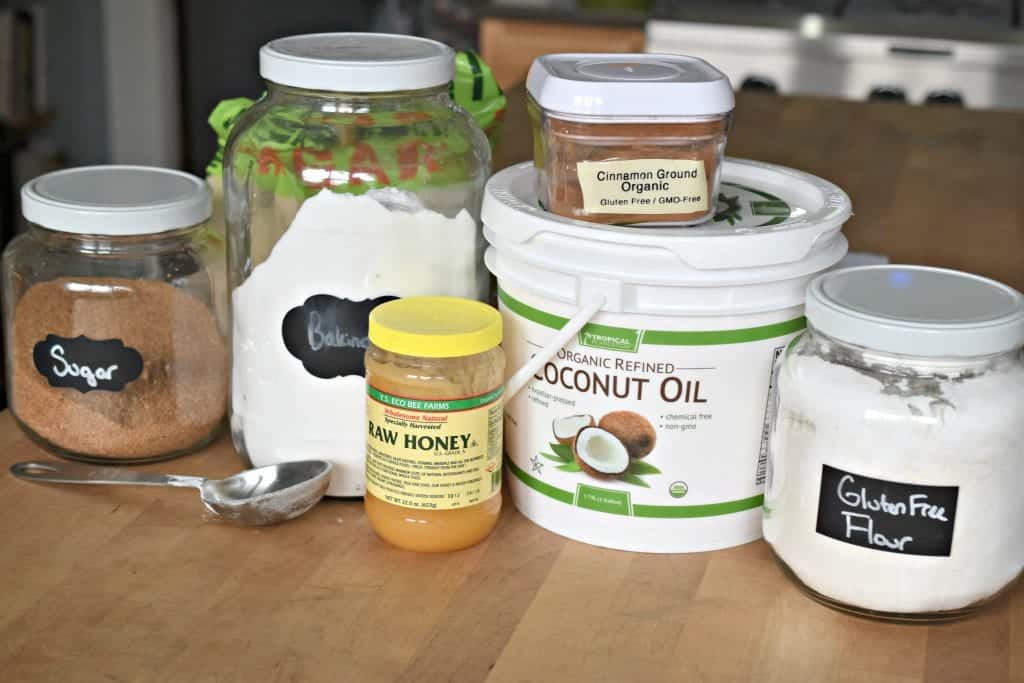
Ingredients for Homemade Cinnamon Toast Crunch
- All-Purpose Flour OR Whole Wheat Flour OR All Purpose Gluten Free Flour. Just about any type of flour will work in this recipe. If you use regular flour, this is a great way to sneak in an extra serving of whole wheat flour for the kids.
- Baking Soda. I always buy my baking soda in bulk.
- Cinnamon. Another ingredient that I always buy in bulk.
- Coconut Oil. We prefer the expeller pressed oil that does not retain the coconut flavor but you can use either kind in this.
- Sugar. You can use raw sugar, cane sugar, or brown sugar in this recipe. All will give it a slightly different flavor but all are good!
- Vanilla Extract. I use my own Homemade Vanilla Extract.
- Honey. I mostly use local honey but if I can’t get any, I will use honey from Azure Standard or Vitacost.
- Water. When cooking or baking, I only use water that I’ve filtered through my Berkey just in case.
- + Extra Cinnamon, Sugar, and Coconut Oil for the topping. (Optional)
How do they make cereal crunchy?
You just need to bake the cereal for a certain amount of time and let it cool completely to get it to be crunchy, just like when you are making crackers.
What ingredients should be in cereal?
Most cereals will start with a base of some kind of flour, a sweetener, and something to bind it together. You can experiment with different flours and different flavors to see what your family likes best!

What Do You Serve With Homemade Cereal?
- Homemade Sausage Patties Recipe.
- Homemade Turkey Breakfast Sausage.
- Any kind of fruit.
- Chopped nuts. Sprinkle these on top for an easy added protein.
- Scrambled Eggs.
- Yogurt and Peanut Butter. Scoop a dollop of yogurt and also a dollop of peanut butter or nut butter on top of the cereal for a treat.
Why make homemade cereal?
This recipe costs about $1.90 to make. It should serve around 4 people depending on your serving sizes. ($0.48 per serving). It can be made gluten and dairy free.
A box of Cinnamon Toast Crunch costs $3 and has 8 servings per box ($0.40 per serving). It contains about 25 ingredients.
How do you make cereal step by step?
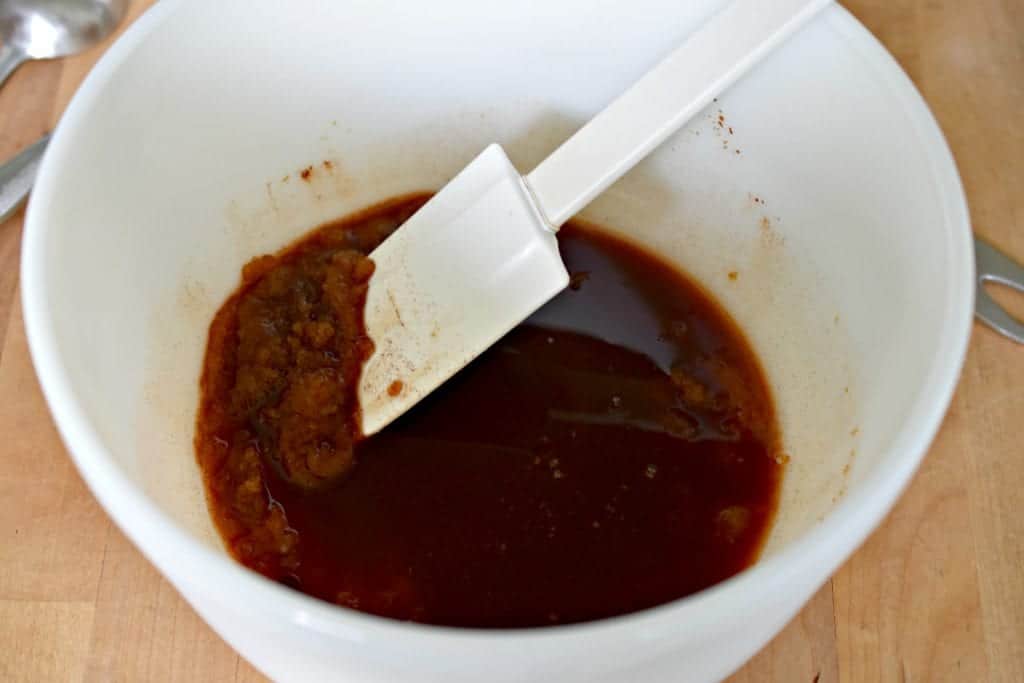
In a large bowl, combine the sugar, cinnamon, vanilla, honey, and melted coconut oil. For this recipe, I used refined coconut oil instead of extra virgin so it would not have the coconut flavor. You can use whatever you have on hand.
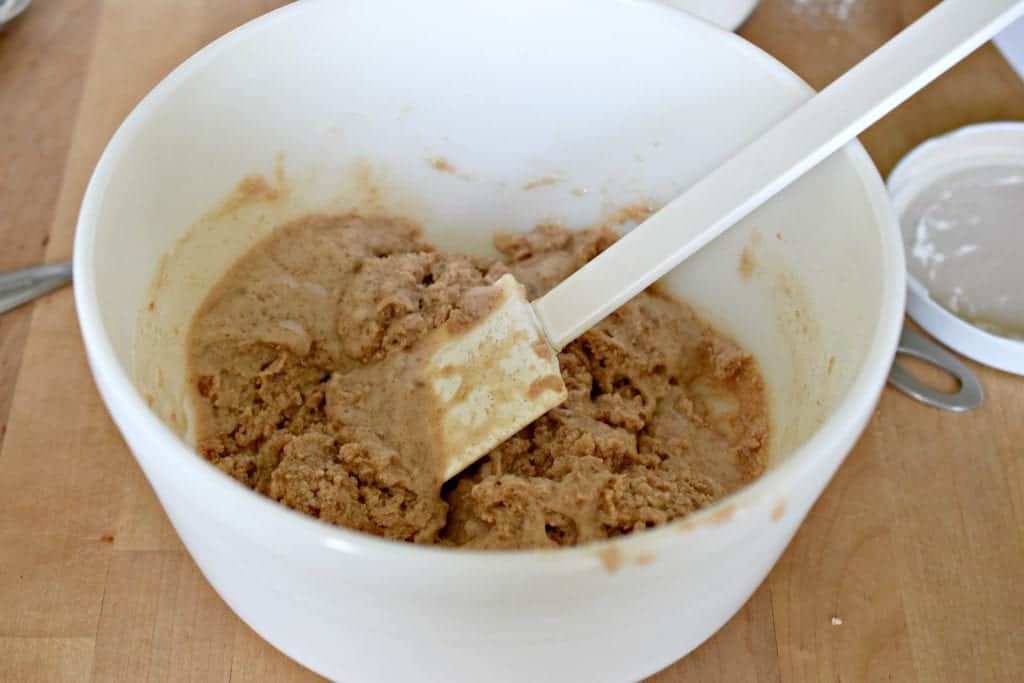
Add in the baking soda, 1 1/2 cups of flour, and water. Stir until combined, the mixture will be messy.
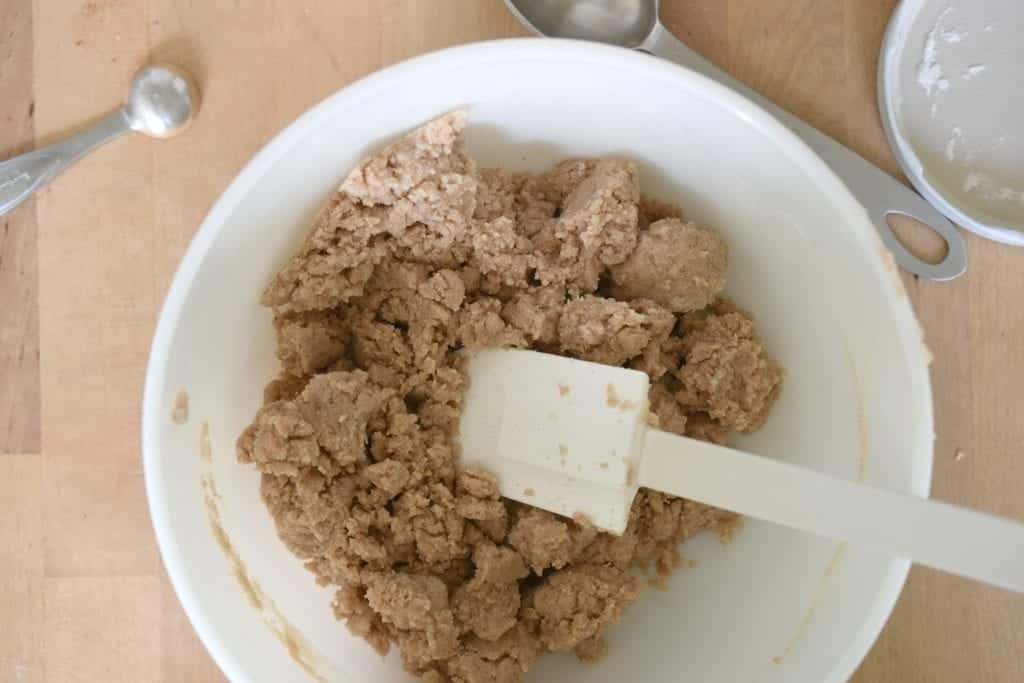
Add in the remaining 1/2 cup of flour. You want the mixture to be somewhat crumbly but not completely dry so if you need to add a bit less or a bit more flour, use this time to get the batter to the right consistency along with whatever flour you are using. I’ve found that a total of 2 cups of my gluten-free flour blend works perfectly with this recipe but depending on the blend you use, or if you decide to use all purpose or wheat flour, the amounts may be slightly different.
Tip: Looking for more Gluten Free recipes? Find more Frugal Gluten Free baking ideas here!
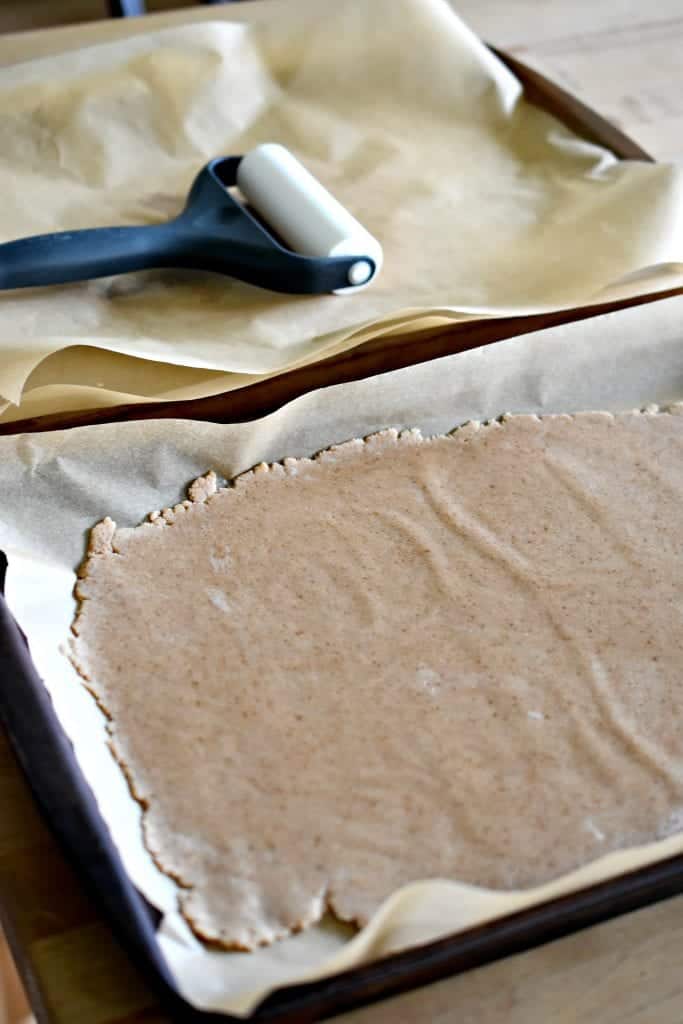
Place a piece of parchment paper onto two baking sheets or cookie sheets. Divide the batter in half between the two pans. Spread it out a little with your fingers and then top with another piece of parchment paper and use a rolling pin to flatten the dough. Roll out to 1/8 inch thick. The thinner you get, the crunchier the cereal!
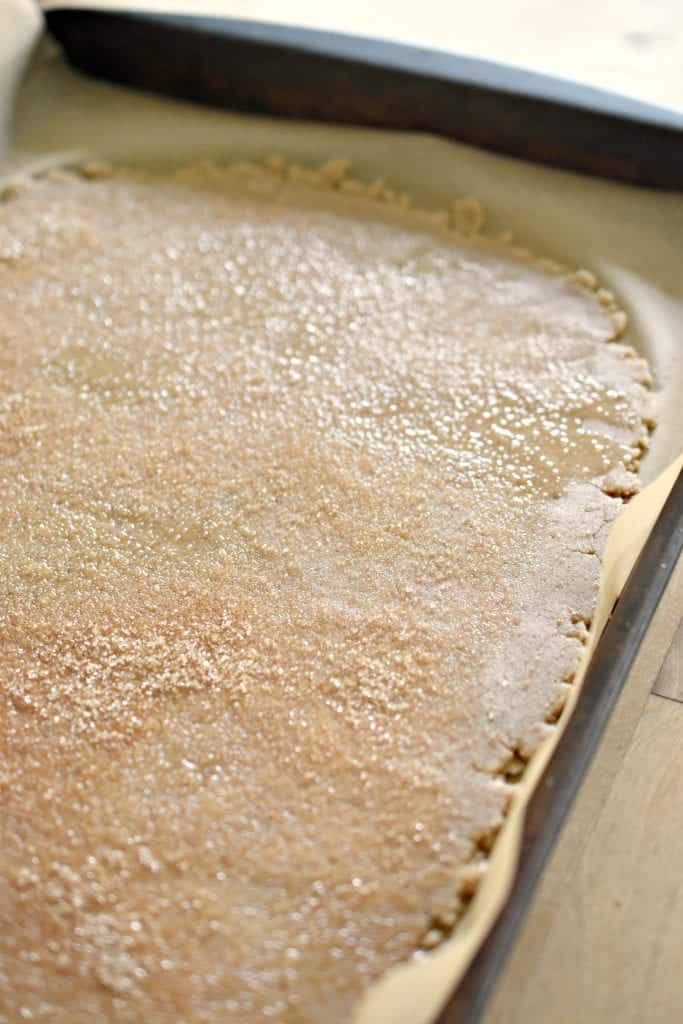
Melt another tablespoon or two of coconut oil and brush over the tops of the flattened dough. In a small bowl, combine 1/8 cup of cane sugar and 1/2 teaspoon cinnamon to sprinkle over the coconut oil. This step is optional…if you want to add as little sugar as possible, you can go ahead and skip this step! However, A layer of melted coconut oil will still add some nice flavor and crunch so I would still add that even if you don’t do the cinnamon/sugar mix.
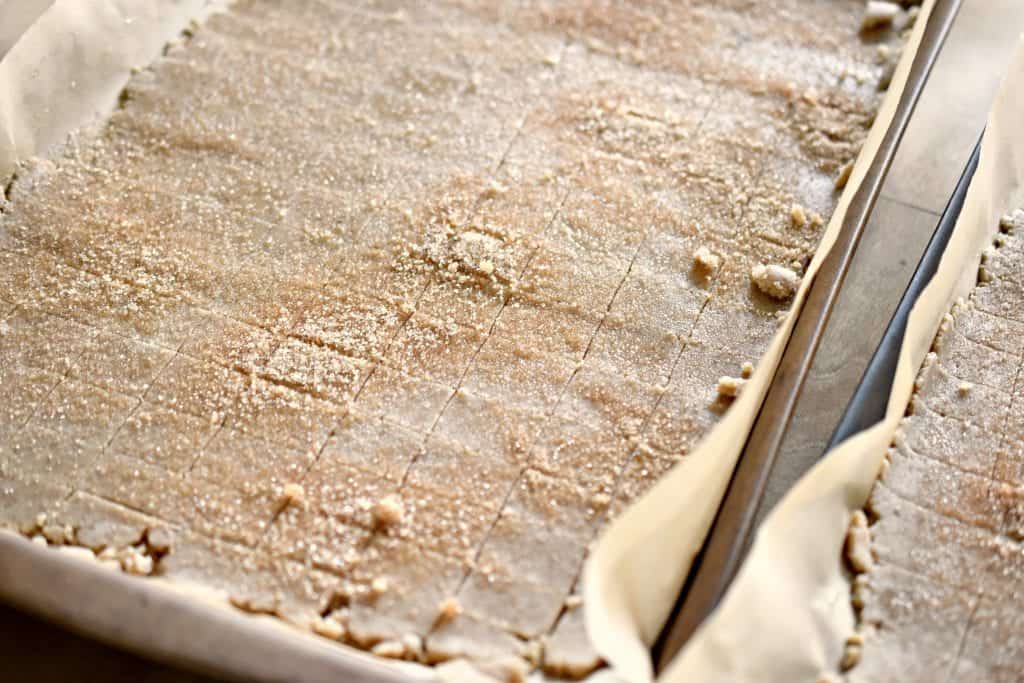
Use a pizza cutter or a small paring knife to score the cereal into small pieces. Bake the sheets at 375 degrees for about 15 minutes or until the cereal has turned a nice shade of brown.
After you remove it from the oven, let it rest for a minute or two on the counter and then use your knife to score the pieces again, but only widthwise (or they will break). Let the pieces cool completely before scooping off the trays.

This recipe will fill about 2-quart size jars or a half-gallon jar. Store in the jar with a plastic lid on the countertop if you plan on eating soon or stick it in the fridge or the freezer for longer term storage.
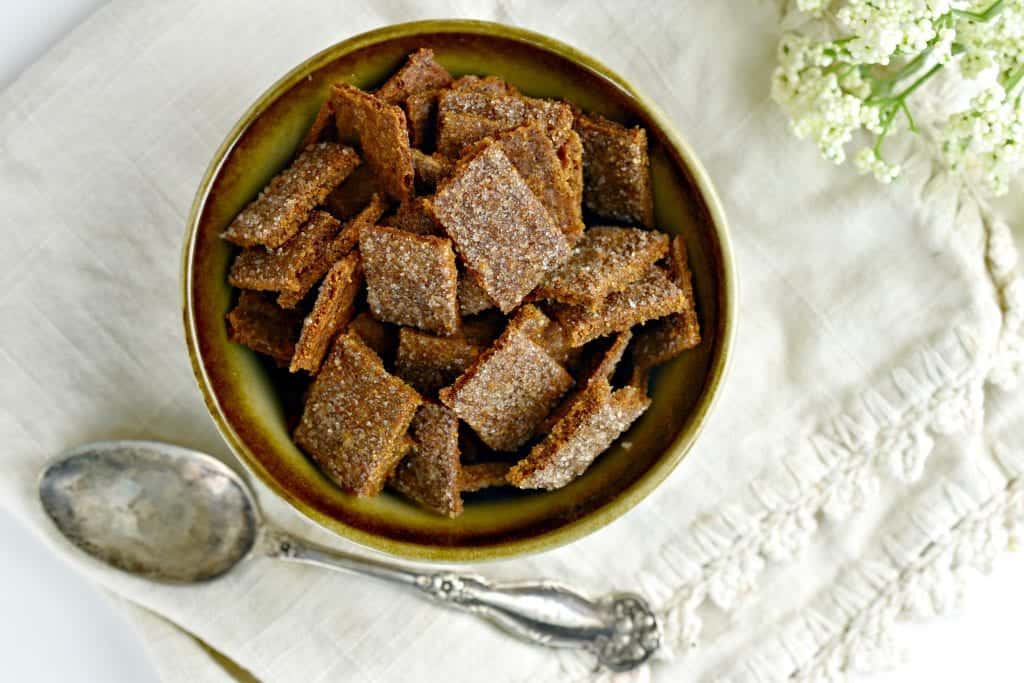
Enjoy for breakfast or as a snack. Not only is it tasty, but it will make your home smell delicious as it’s cooking. Win-win!

Want to print this Homemade Cinnamon Crunch Cereal recipe? Grab it below:
Homemade Cinnamon Toast Crunch
Ingredients
- 2 cups All Purpose Flour OR Whole Wheat Flour OR All Purpose Gluten Free Flour
- 1 1/2 teaspoons Baking Soda
- 1 teaspoon Cinnamon
- 1/3 cup Coconut Oil
- 1/4 cup Raw Sugar
- 1 teaspoon Vanilla Extract
- 2 Tablespoons Honey
- 1/2 cup Water
- + Extra Cinnamon, Sugar, and Coconut Oil for the topping. (Optional)
Instructions
-
In a large bowl, combine the sugar, cinnamon, vanilla, honey, and melted coconut oil. (For this recipe, I used refined coconut oil instead of extra virgin so it would not have the coconut flavor. You can use whatever you have on hand.)
-
Add in the baking soda, 1 1/2 cups of the flour, and the water. Stir until combined, the mixture will be messy.
-
Add in the remaining 1/2 cup of flour. You want the mixture to be somewhat crumbly but not completely dry so if you need to add a bit less or a bit more flour, use this time to get the batter to the right consistency along with whatever flour you are using. I’ve found that a total of 2 cups of my gluten-free flour blend works perfectly with this recipe but depending on the blend you use, or if you decide to use all-purpose or wheat flour, the amounts may be slightly different.
-
Place a piece of parchment paper onto two baking sheets or cookie sheets. Divide the batter in half between the two pans. Spread it out a little with your fingers and then top with another piece of parchment paper and use a rolling pin to flatten the dough. Roll out to 1/8 inch thick. The thinner you get, the crunchier the cereal!
-
Melt another tablespoon or two of coconut oil and brush over the tops of the flattened dough. In a small bowl, combine 1/8 cup of cane sugar and 1/2 teaspoon cinnamon to sprinkle over the coconut oil. This step is optional…if you want to add as little sugar as possible, you can go ahead and skip this step! A layer of melted coconut oil will still add some nice flavor and crunch so I would still add that even if you don’t do the cinnamon/sugar mix.
-
Use a pizza cutter or a small paring knife to score the cereal into small pieces. Bake the sheets at 375 degrees for about 15 minutes or until the cereal has turned a nice shade of brown. After you remove it from the oven, let it rest for a minute or two on the counter and then use your knife to score the pieces again, but only widthwise (or they will break). Let the pieces cool completely before scooping off the trays.
-
This recipe will fill about 2 quart size jars or a half gallon jar. Store in the jar with a plastic lid on the countertop if you plan on eating soon or stick it in the fridge or the freezer for longer term storage.

More Homemade Breakfasts
- Make Ahead Breakfasts for a Busy Season
- Easy Breakfast Themes to Simplify Your Mornings
- The Best Healthy Breakfast Smoothies
- Slowcooker Breakfast Recipes
- Best Homemade Granola
- 20 Delicious Oatmeal Breakfast Recipes
- Healthy Zucchini Breakfast Cookies
Find even more made from scratch Breakfast ideas!
Have you ever tried to make your own homemade cereal?

Merissa Alink
Merissa has been blogging about and living the simple and frugal life on Little House Living since 2009 and has internationally published 2 books on the topic. You can read about Merissa’s journey from penniless to freedom on the About Page. You can send her a message any time from the Contact Page.
This recipe to Make Your Own Homemade Cereal was originally published on Little House Living in September 2017. It has been updated as of January 2025.
Omigosh…. You always have the perfect posts for my family! I am so excited to try this out, it’s my family’s favorite cereal. We usually do big breakfasts, but my kids love to snack on cinnamon toast crunch. The store bought isn’t so healthy… Which is one more reason it’s best to keep my husband out of the grocery stores. He loves this stuff too! And with the weather cooling down and harvests put away, it’s back to baking! Do you think this would work with spelt flour? And, if so, should I add any tweeks to the recipe? We also do a granola recipe…. Omigosh…. Don’t know how healthy it is after we add honey, chocolate chips, and toasted coconut… But it’s organic! Lol!it makes the house smell good though!
I haven’t used much spelt but I do think it would work. You may need to add slightly more or less flour but as long as you can roll it out you should be good to go! This recipe isn’t very finicky 🙂
Hi Meriissa. My name is Juliet and I just came across your recipe? I’m a person who believes in butter. Can I use butter for this recipe?
Yes, it should work the same. 🙂 And it’s not that I don’t believe in butter, we simply can’t have dairy in our house. 🙁
First of all…I LOVE your blog, Instagram and website! I tried these today…followed your recipe with gluten free flour and they turned out great! What an easy snack or breakfast. Mine did brown quickly so next time I’ll bake at 350. Thank you for all the inspiration you bring me!
Awesome, I’m so glad you tried them already! 🙂
This looks awesome! I’ll definitely be trying these. With 4 little ones I’m always looking for yummy “less-processed” food and snacks!
I just have to tell you how much I appreciate your blog! I have used so many of your recipes, and you are an inspiration!
Aw, thank you Julia! I hope you enjoy this recipe when you get a chance to make it.
This was my kids’ favorite cereal…they are now 39, 37,and 35 !!! I plan on making some, though, because they are all trying to feed their families healthier. Thanks, and I’ll let you know the verdict !
I hope you enjoy it!
Thank you! I really like this recipe and gluten free too. Healthy too! I will add fruit protein smoothie or a few nuts on the side to make sure protein happens at breakfast.
This recipe sounds awesome! I am definitely making this today, but between the two of us (husband and me, no kids) there probably won’t be hardly any left over for breakfast. Guess I’d better plan on a double batch. Love your recipes! They are all so people friendly, as well as being healthy and delicious. By the way, I treasure your book. It is so chock full of delicious recipes, hints for meal planning, and instructions for storing a wealth of ready to make meals. It’s a lifesaver for busy families, as well as for people who are planning for natural disasters like hurricanes, storms, etc. where you may not have electricity for long periods of time. A simple thank you does not seem adequate, but it is all I have. So, Thank You!
Aw thank you! A simple thank you really is enough, by the way, I love hearing when things I’ve written are useful. Yes, I would double this recipe if you want to make more than a day or two’s worth at a time.
This sounds so delicious. Thank you for sharing.
You have just made my day! This is my all time favorite cereal and I have missed it since I had to go gluten free. So excited to try this!
I hope you enjoy it!
Yum! This looks so amazing! We’ve started making more at home to avoid processed foods but never thought about cereal! Definitely trying this soon! Thanks for the inspiration!
This is a great recipe that I can’t wait to try! Thanks so much for sharing your post with us at Full Plate Thursday! Have a great week and come back to see us real soon!
Miz Helen
That looks way more delicious than the store bought kind – thanks for sharing your recipe on this weeks Creative K Kids Tasty Tuesday!
This looks delicious! Those are some of my family favorites, too.
I love this! Never thought about making my own cereal (granola, yes, but cereal?) but it makes sense of course. I’m featuring the recipe of at the Friday Favorites linky party.
Have a lovely weekend!
Thank you for the feature!
I am super impressed that you make your own cereal. Now that is a dedicated mama!
For anyone wondering about substituting the coconut oil out (for those that can’t have it or just don’t have it and still want to make this), I tried one batch with vegetable oil and another with melted butter, both came out delicious. I didn’t get to try shortening as I was all out, but I suspect it would come out flakier.
Thanks for the great recipe! It’s super tasty and I know we’ll be using it a lot! 🙂
Perfect, thanks for sharing that substitution!
No problem! I know a lot of times food bloggers get questions about substitutions, but they don’t usually get to test out a bunch themselves. 🙂 I’m excited that I can make it, as I can’t eat some of the fake sugars they use in the grocery store version (plus this is healthier, even with butter haha). I missed having it! Thanks so much again! I’ll be checking out more of your recipes for sure!
Thank you! We have a coconut allergy and I was hoping to try ghee or homemade butter
Thank you mrs Melissa ur website is one of the best I do 19th century stuff modern days stink I wish we could go back to living like this thanks to mc Donald’s Burger King Wendy’s I also make stuff like this for my family parties
<3
How to make gluten free flour our own?
Here’s my recipe — All Purpose Gluten Free Flour.
I can’t wait to try this. It’s my husbands favorite cereal. Mine is Golden Grahams, I wonder how you would do that.
I will have to experiment a little more!
Just found you as I landed here to learn how to make yarn dolls. What a feast of yummy,
research-based goodies for living simply and frugally. I am in love. With the sights, the ideas, the recipes, the wisdom.
Wow.
So happy you are here, bringing light and offering alternatives.
Keep being you.
The people need you. The planet needs you.
Cheers!
My husband and i got contented that Jordan managed to carry out his analysis with the precious recommendations he gained through your site. It’s not at all simplistic just to possibly be giving freely helpful hints that many people may have been selling. Therefore we take into account we have got the writer to appreciate for this. The specific explanations you have made, the simple website menu, the relationships you can make it possible to engender – it’s got everything remarkable, and it is aiding our son in addition to our family believe that the article is amusing, which is certainly particularly fundamental. Many thanks for everything!
Hi, can I make this with barley flour or cornmeal?
I’ve always heard of Cinnamon Toast Cereal but haven’t tried it before so am very excited to make it from scratch!
I wanted to know if I can leave out the honey?
You can leave it out but I would recommend maple syrup or something similar in its place.
Could you can these after baking with one of those tools that just sucks the air out? Or do you think they still wouldn’t be shelf stable?
I’ve tried it but they turned out not crispy at all, they are soft and the only crispy part is the sugar on top. First batch was already blackened after ten minutes (and still soft) even with checking the oven thermometer for the right temperature at all times. I rolled it out very flat but don’t think I’ll make this again😔
Mine turned out the same way?! I was so excited:( I did use whole wheat flour, regular sugar and virgin olive oil?
This recipe was amazing! I overcooked mine slightly, but they were delicious and I’ll definitely be making them again soon!
Hi!
I love the recipe. I wonder if I can substitute coconut oil for butter in this recipe?
Yes, butter should work fine in this recipe.
I don’t have coconut oil on hand and don’t want to go buy any. Is there a substitute?
You can use another kind of oil or butter in place of coconut oil.
I read your blog all the time but this is the first time I think I’ve actually commented—I love this recipe! I used butter instead of coconut oil and I used whole wheat flour. I made it for my husband’s birthday and he LOVED it so much that we took samples to family members to try! They all liked them! They turned out a little softer than the box cereal but nobody minded too much.
Now I’ve made another batch for my sister’s family, and another for us! We rolled the dough a little thinner this time and they turned out a little crispier!
AND—we made another batch of CHOCOLATE cereal using the same recipe but switching out the cinnamon and 1/4 cup of the flour for cocoa powder. We had to adjust the flour a bit as the dough was a little wetter but they are DELICIOUS too! So glad I found this recipe to make whole wheat cereal for my family! Thank you so much for sharing!
The chocolate version sounds delicious!
Hi Merissa:
You never cease to amaze me with all the made from scratch recipes that you’ve done. This cereal recipe is really neat. Never thought about trying to make my own cereal. I’m putting this recipe on my must try list. I used to make my own granola and granola bars which helped fill up my 4 ravenous sons. The granola bars were great for school lunches.
I just enjoy your emails so much. They are filled with great recipes and frugal living ideas. One of my favorite things to do is to D.I.Y. . Looking forward to making my own cereal and some of the other recipes you have shared. THANKS!
Thanks for the recipe and the detailed instructions.I plan to try it soon. I’m thinking of adding some dried fruit (raisins or cranberries). This cereal would make a great take along snack, too.
Thanks and have a great week!
Not sure what I did wrong I followed the recipe to a T and mine came out like teeny little squared biscuits 😭 not going to let them go to waste though my tot will enjoy them since he’s a bread fanatic
Hi! I just stumbled across this recipe and I was wondering what you thought about adding protein powder to make it a higher protein breakfast option for my kiddos? Think I should try it?? 🙂 Thanks in advance!
You could, you might want to leave out some of the flour to balance the dry ingredients.
I added bran and it works really well. I dont know if you added the breakfast photo at the bottom but it is so weird lol the AI made the toast roast chicken shaped and why are there eggs in every other dish lmao I just had to comment idk if anyone else can see it
No AI photos in this article, sorry. Glad you enjoyed the recipe!